
How to sign documents using Swisscom
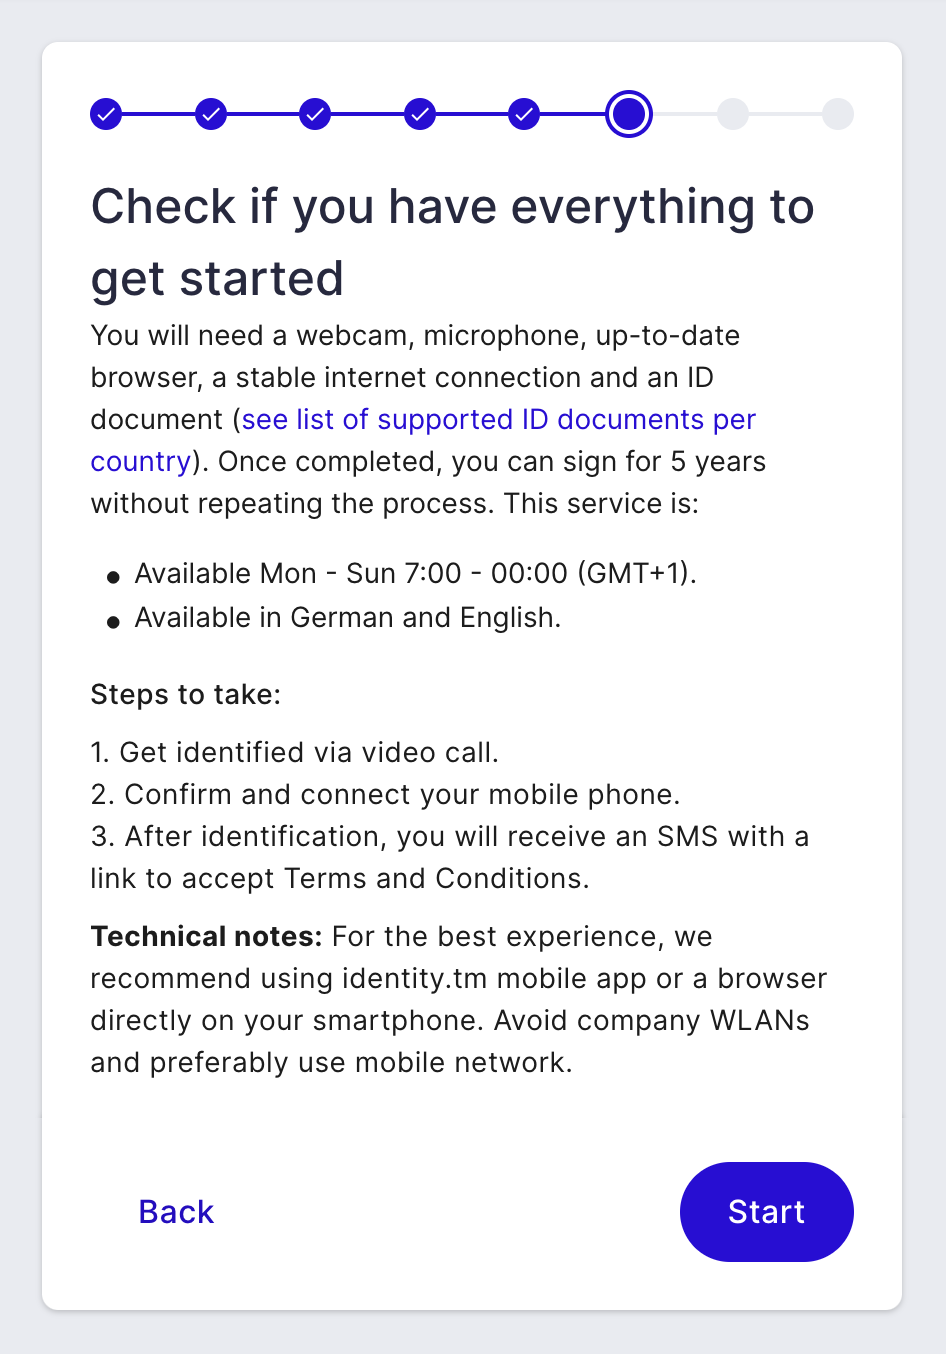
Swisscom's Signing Service, or Swisscom for short, offers the ability to create a tool for signing documents by going through a one-time video-based identification process. This signing tool produces QES-level signatures and can be used with PDF files only. To get started, you will need a stable internet connection; a valid passport (for some citizens, an ID card is also accepted); a mobile phone; and a device with a working web camera. Additional apps may need to be downloaded as well.
In this article:
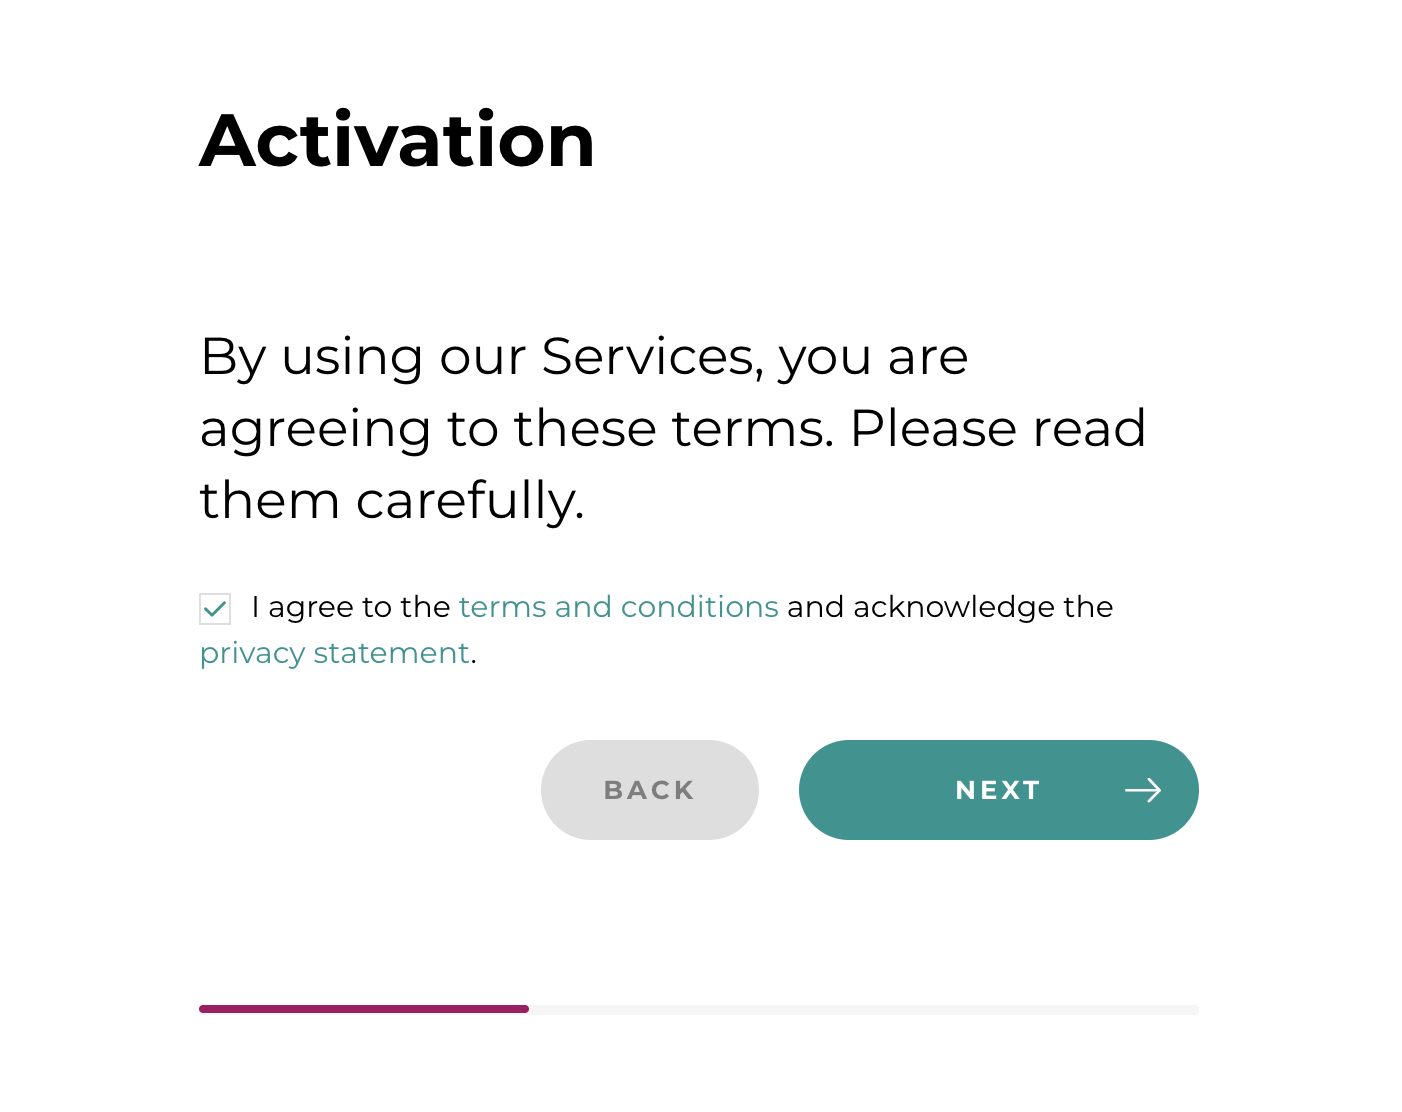
- An Introduction to Swisscom
- How to enable or disable the option to sign with Swisscom when sharing documents with others
- How to sign documents using Swisscom
- Additional instructions: setting up Mobile ID
- Additional instructions: verifying your identity with Selfie-Ident
- Additional instructions: verifying your identity with video identification
An Introduction to Swisscom
A brief overview
Similarly to SignicatID, Swisscom offers the ability for invited participants to verify their identity by using video-based identification. Here are some of the key characteristics of what it has to offer:
→ The ability to sign PDF documents with QES-level e-signatures.
→ A one-time onboarding process for verifying your identity. Once a person successfully goes through the video-based identification, the results are valid for either 2 or 5 years, depending on the chosen identity verification method (see step 2.5.), and as long as the passport or ID card that was used does not expire sooner. What this means is that the signing process for every following document will be quicker and easier since re-identification will not be required for each signature.
→ The ability for some citizens to use Swisscom in a self-registered Dokobit account that is created with an OTP (One-Time Password). This allows more freedom for these users by offering them the chance to upload and sign documents themselves without needing a third party to send them signing invitations through accountless signing.
→ Lower expenses per signature after covering the initial fee of the first-time onboarding process. Check out our price guide here.
There is also a drawback that is worth mentioning:
→ The first-time onboarding process when setting up an account for Swisscom might feel a bit tricky since it can require installing a few mobile apps, depending on the route you take when verifying your identity (see steps 2.4. and 2.5.). If you are looking for a simpler way to collect signatures from non-tech-savvy individuals who will not be required to sign documents frequently, we recommend using SignicatID instead.
Supported countries
In the Dokobit portal, Swisscom can be used in combination with accountless signing to collect signatures from citizens of the following countries:
Albania, Andorra, Angola, Argentina, Armenia, Australia, Austria, Belarus, Belgium, Brazil, Bulgaria, Canada, China, Colombia, Costa Rica, Croatia, Cyprus, Czechia, Denmark, Egypt, Estonia, Finland, France, Georgia, Germany, Greece, Hungary, Iceland, India, Indonesia, Ireland, Israel, Italy, Jamaica, Japan, Kuwait, Latvia, Lebanon, Liechtenstein, Lithuania, Luxembourg, Malaysia, Malta, Mexico, Netherlands, North Macedonia, Norway, Panama, Paraguay, Peru, Poland, Portugal, Romania, Singapore, Slovakia, Slovenia, South Africa, South Korea, Spain, Sweden, Switzerland, Taiwan, Thailand, Tunisia, Turkey, Ukraine, United Kingdom, United States, Vietnam.
Countries in bold: capable of also registering a Dokobit account using OTP, if necessary.
How to enable or disable the option to sign with Swisscom when sharing documents with others
Summary: Users of the Dokobit portal who have purchased a paid plan subscription can enable or disable the option for added participants to sign documents through accountless signing by using Swisscom. This can be done by adjusting the settings of a document before it gets sent out for signing. Follow the steps below to find out how. ↓
1.0. At the top right side of the screen (right under your name), press the "Upload document" button.

1.1. Fill out all of the necessary information in the first three steps of the document uploading process.
Note: Just a reminder that this document signing method supports PDF files only. Files that have been shared in a container format will prevent the added participants from signing with SignicatID or Swisscom.
1.2. When you reach the fourth step, you can edit several document settings, as seen in the image below. The last two settings at the bottom of this section allow you to enable or disable signing with Swisscom. Continue reading to find out more.

1.3. First, press the "Edit" button next to the "Allowed e-signature levels" setting.

This will open a new window. In it, you will see three different sections for available signature levels. Please expand the section for "Qualified Electronic Signature (QES)" by pressing the arrow on the right. Here, you can mark or unmark the option to sign with Swisscom. Remember to press "Save" if changes have been made.
Note: If you are not permitted to enable this setting, please contact the company account owner to see if this permission could be granted in the default settings. This restriction applies to Business and Enterprise plan users only.

1.4. In most cases, the setting for accountless signing must also be enabled to allow participants to sign with Swisscom. Therefore, in the section for "Allow signing or viewing this document without a Dokobit account," add or remove a checkmark to set the desired setting.

1.5. When you're done filling out all the steps, press "Send" at the bottom of the page to share the document with your added participants.

Note: Don't forget – paid plan users are financially responsible for all signatures from all invited signing participants. Check out our price guide here.
How to sign documents using Swisscom
Summary: If you haven't already done so, you will first need to set up your Swisscom account by going through a one-time video-based identification which can be done during the process of signing a document. Follow the steps below to find out how. ↓
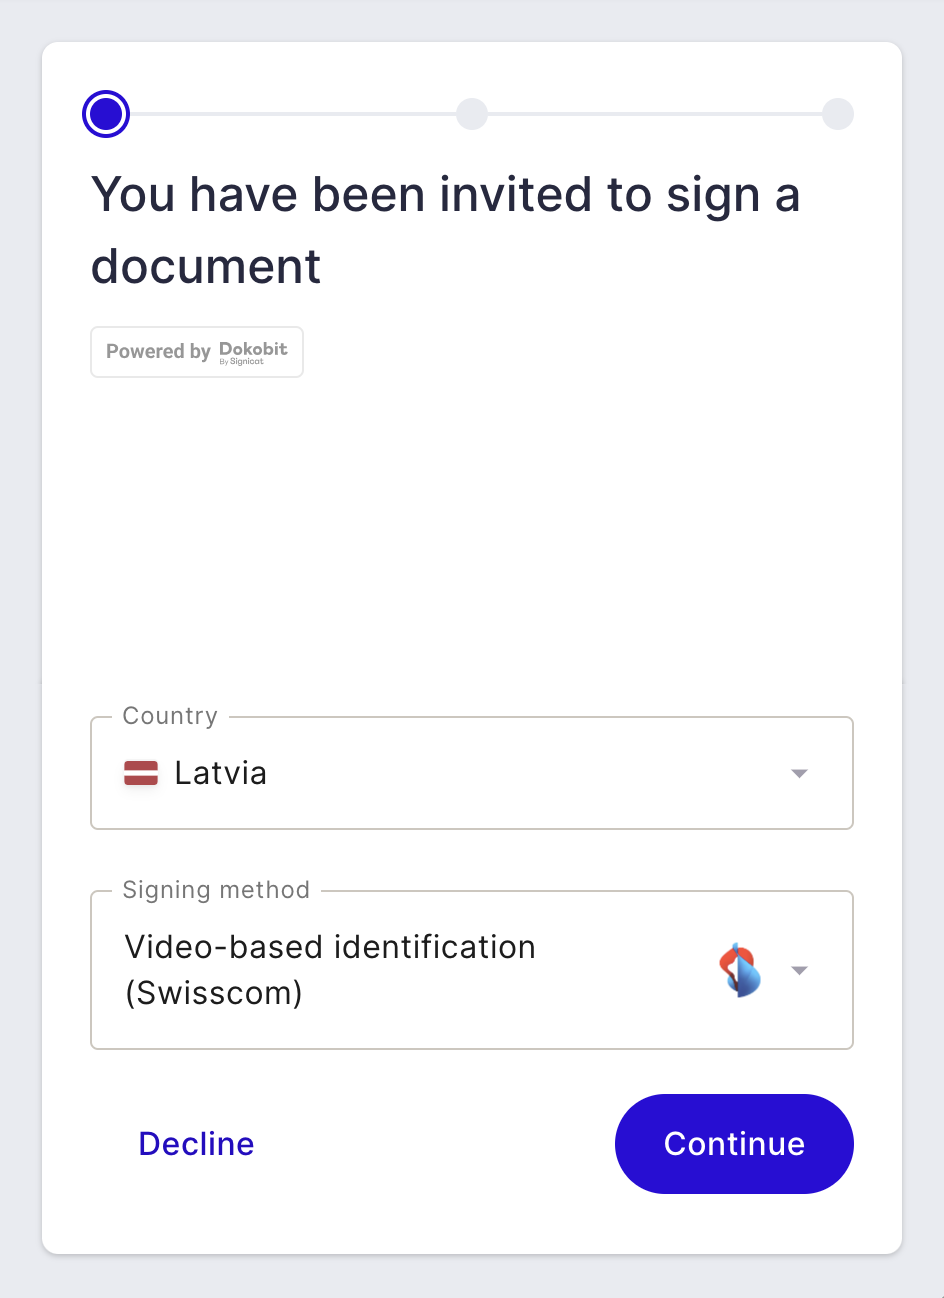
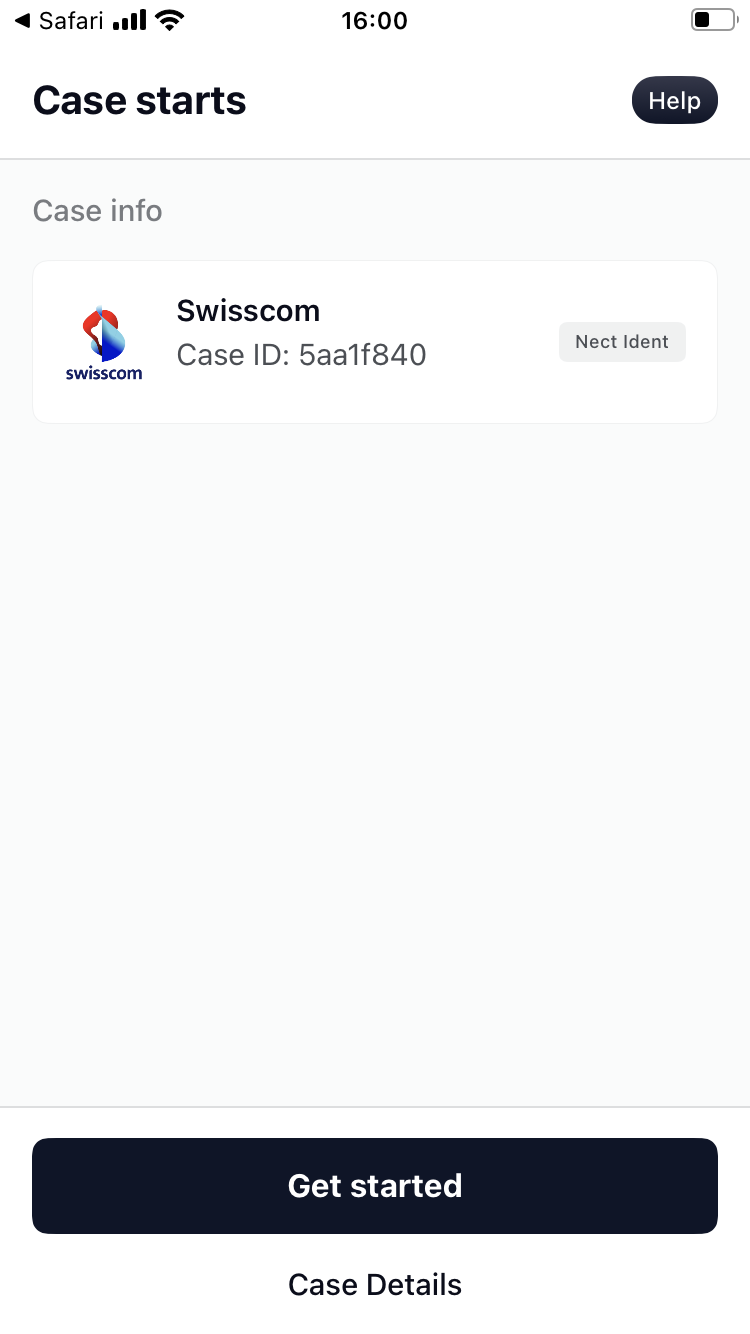
2.0. There are two ways to start the signing process of a document when using Swisscom's video-based identification.
Option 1:
In a Dokobit account that has been registered with an OTP (see limitations here), prepare a PDF document for signing. Then at the bottom of the page, choose the "Sign with QES" tab and press "Sign".

Option 2:
Open a Dokobit email invitation that you received and press "Review and sign".

2.1. Once you get redirected to the signing page of the document, in the first drop-down menu, select the issuing country of your ID, and in the second one, choose the Swisscom signing solution.
Note: This signing method will not be available to you if your document was issued by a country that is not listed in the drop-down menu.
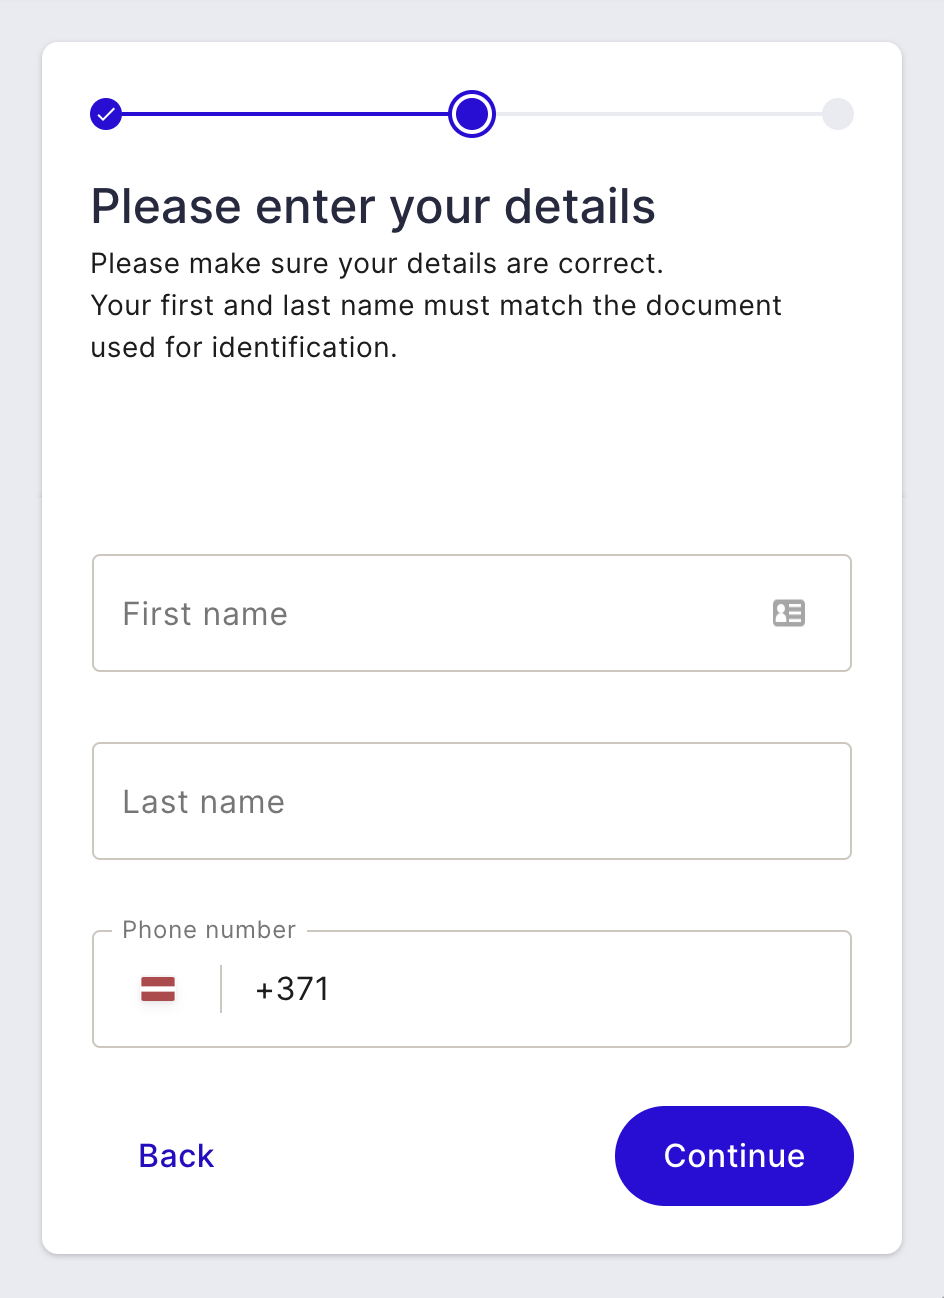
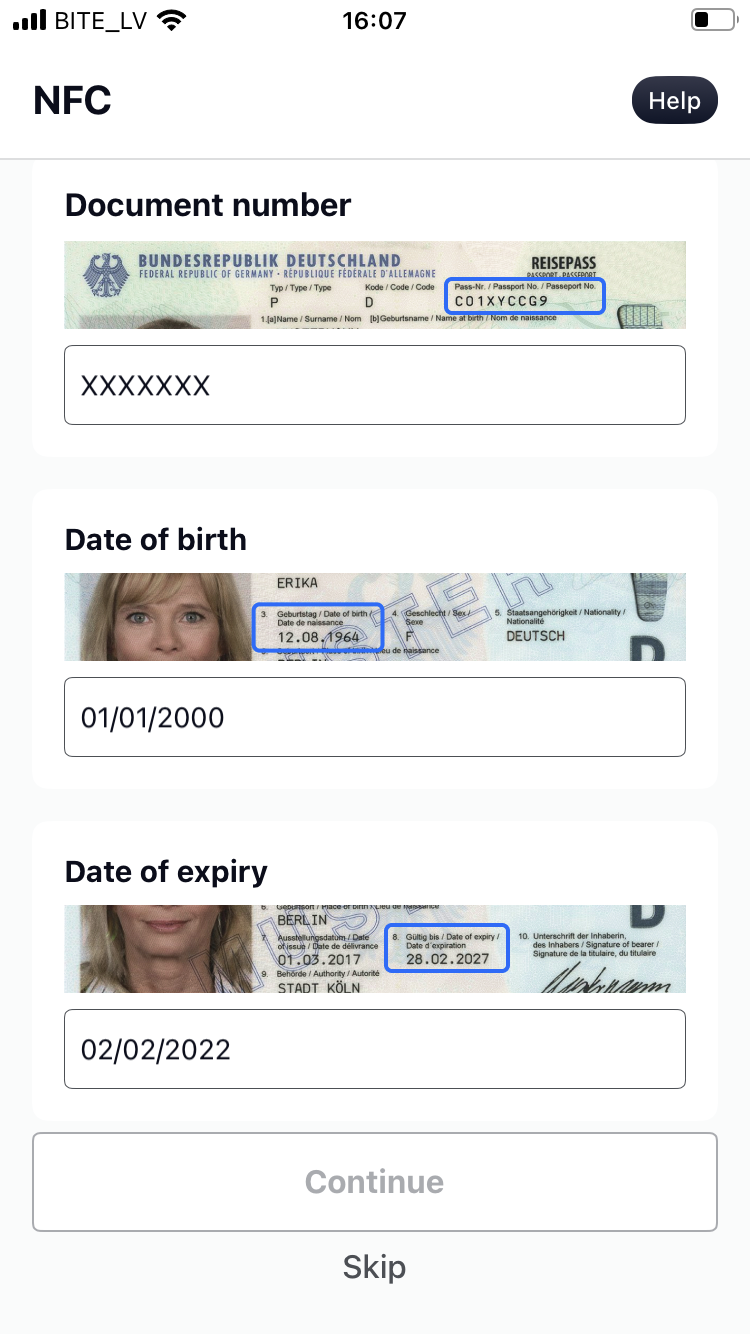
2.2. Enter your personal details and press "Continue".
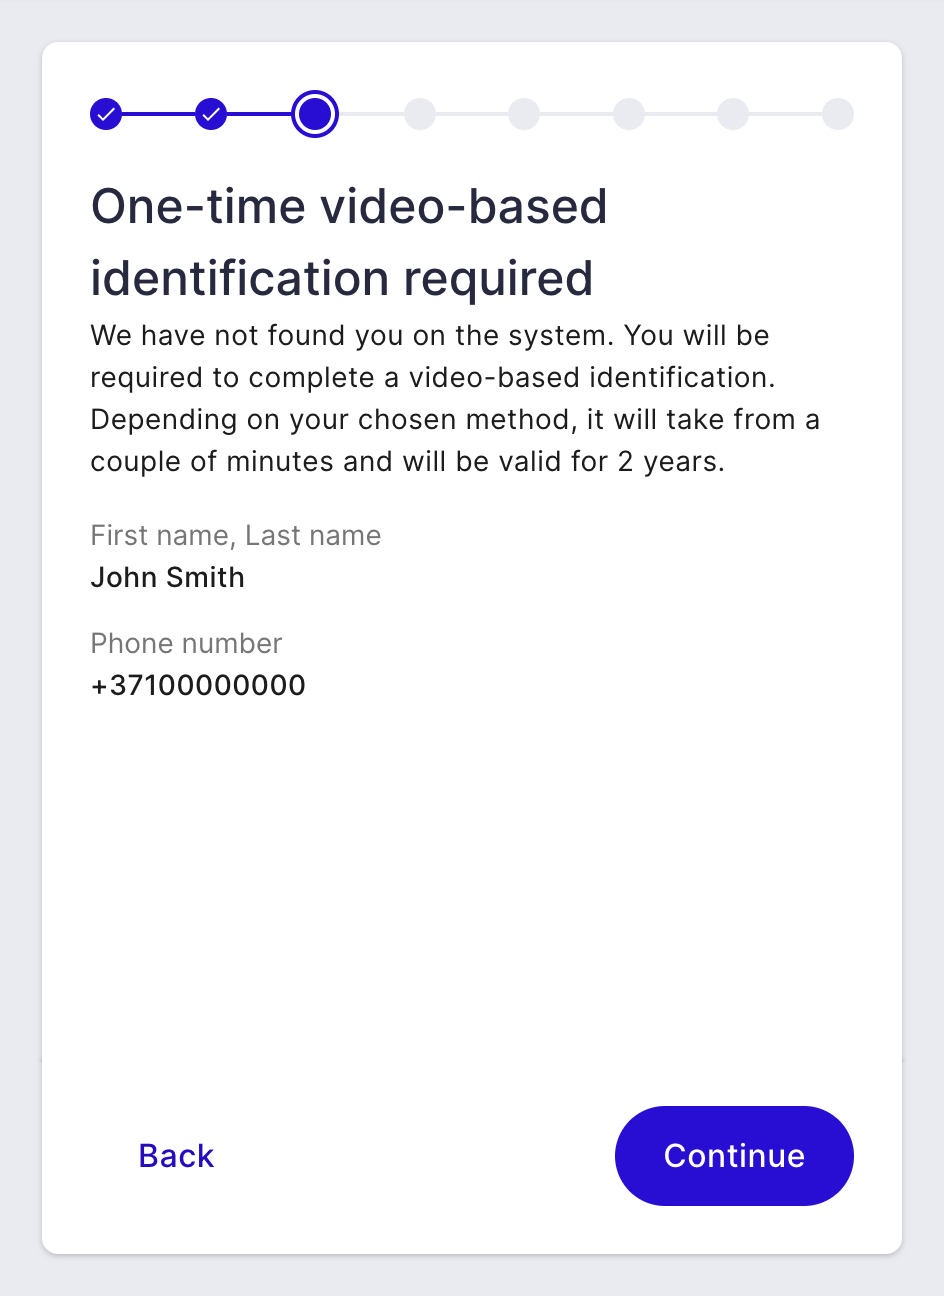
2.3. In the following step, the system will react in one of two ways.
Option 1: If the system detects that your personal details are not connected to an existing Swisscom account, you will be required to set it up by going through a one-time video-based identification. Press "Continue" to begin this process.
Option 2: If the system detects that your personal details are connected to an existing Swisscom account, skip to step 2.7.
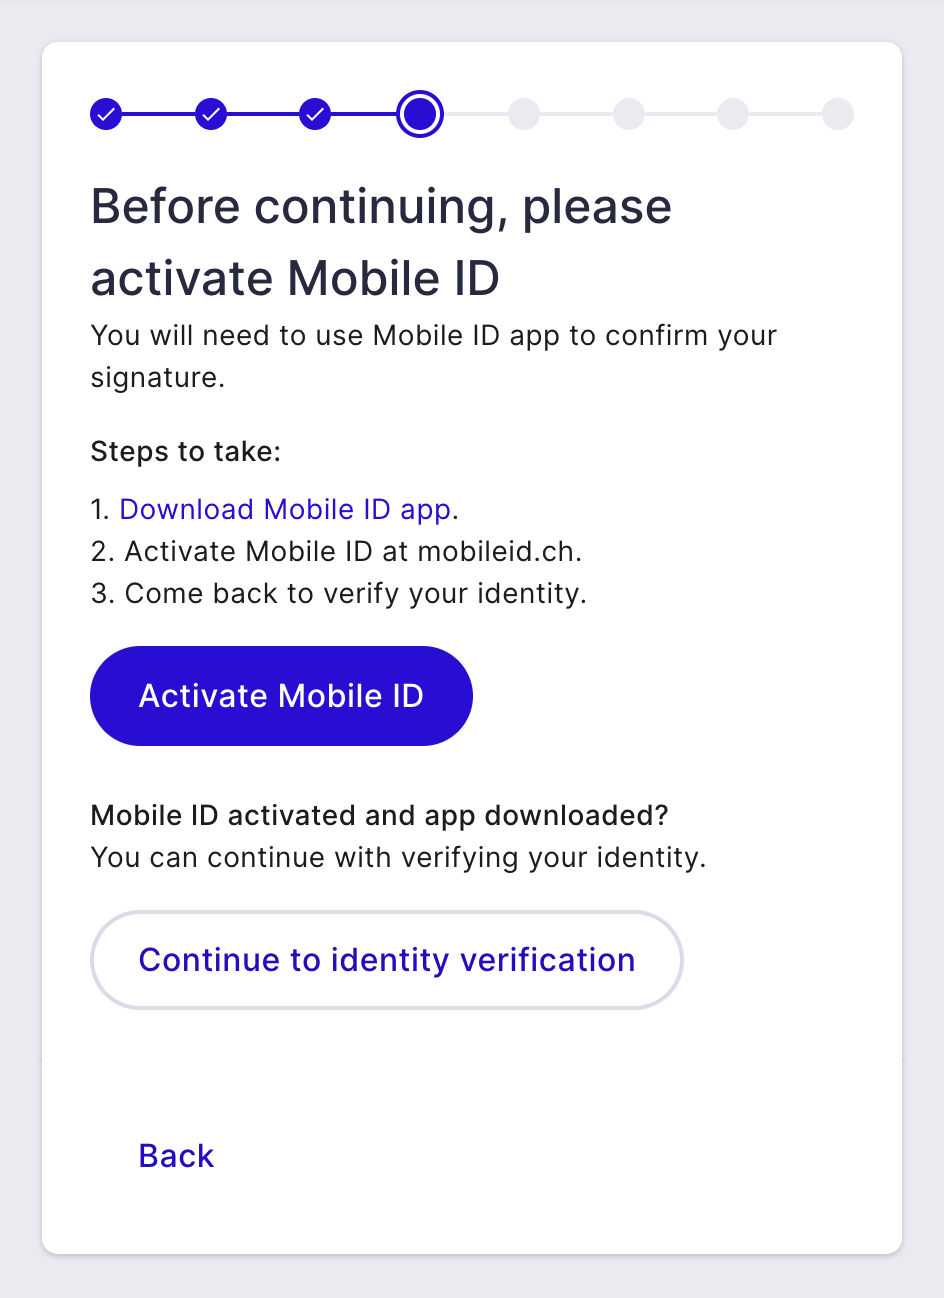
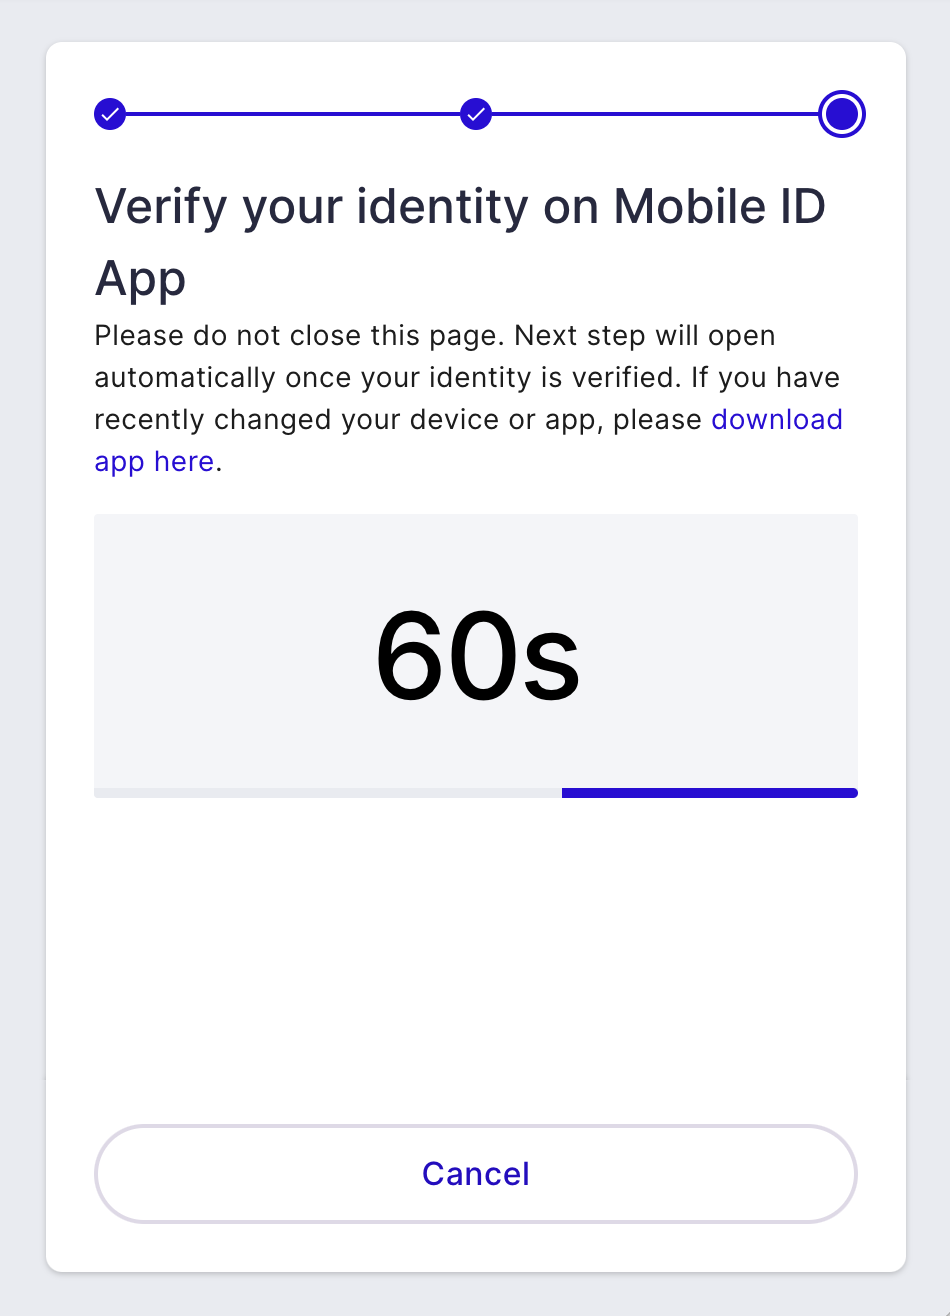
2.4. Next, the system will ask you to activate a Mobile ID account; however, please be aware that this step is optional. Therefore, you will be able to continue in one of two ways.
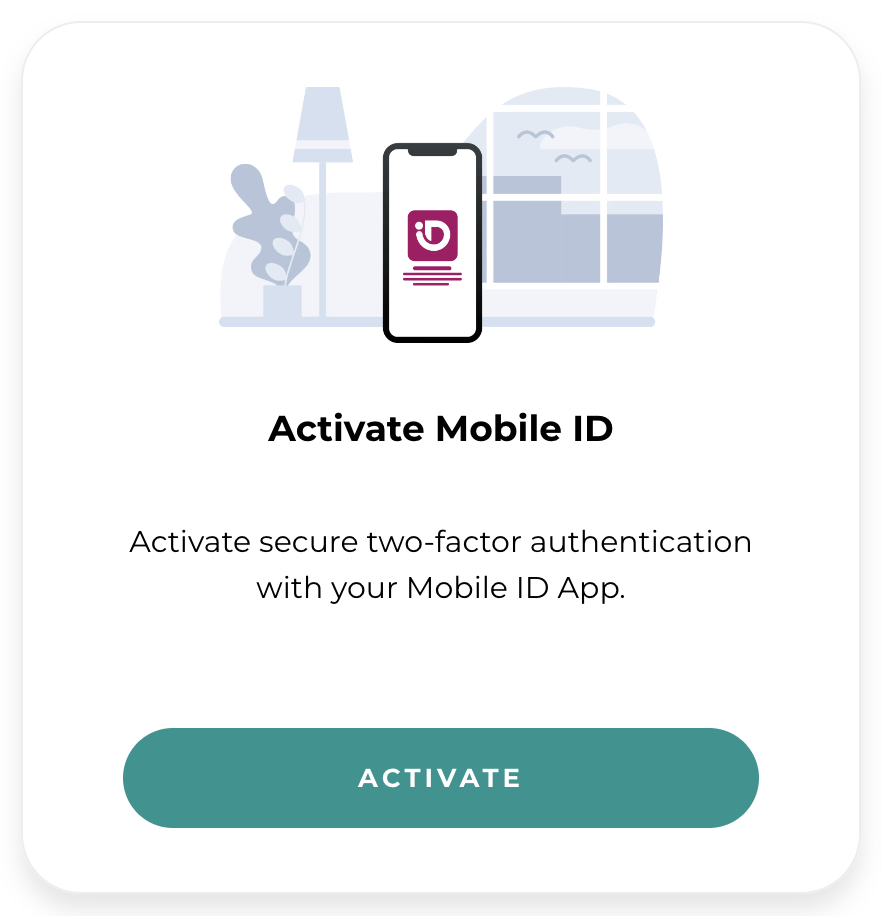
Option 1 (recommended): If you don't have an active Mobile ID account, press "Activate Mobile ID" and follow the instructions listed between steps 3.0. and 3.6. Once you're done setting up your Mobile ID account, resume following the steps below.
Option 2: If you do have a Mobile ID account or have decided not to set one up, press "Continue to identity verification". Users who choose not to set up a Mobile ID account will be able to sign documents by instead setting up a password when going through one of the available identity verification methods (see the next step for more information on these methods). To see an example of how the password is created, go to the additional instructions for Selfie-Ident and see step 4.16.
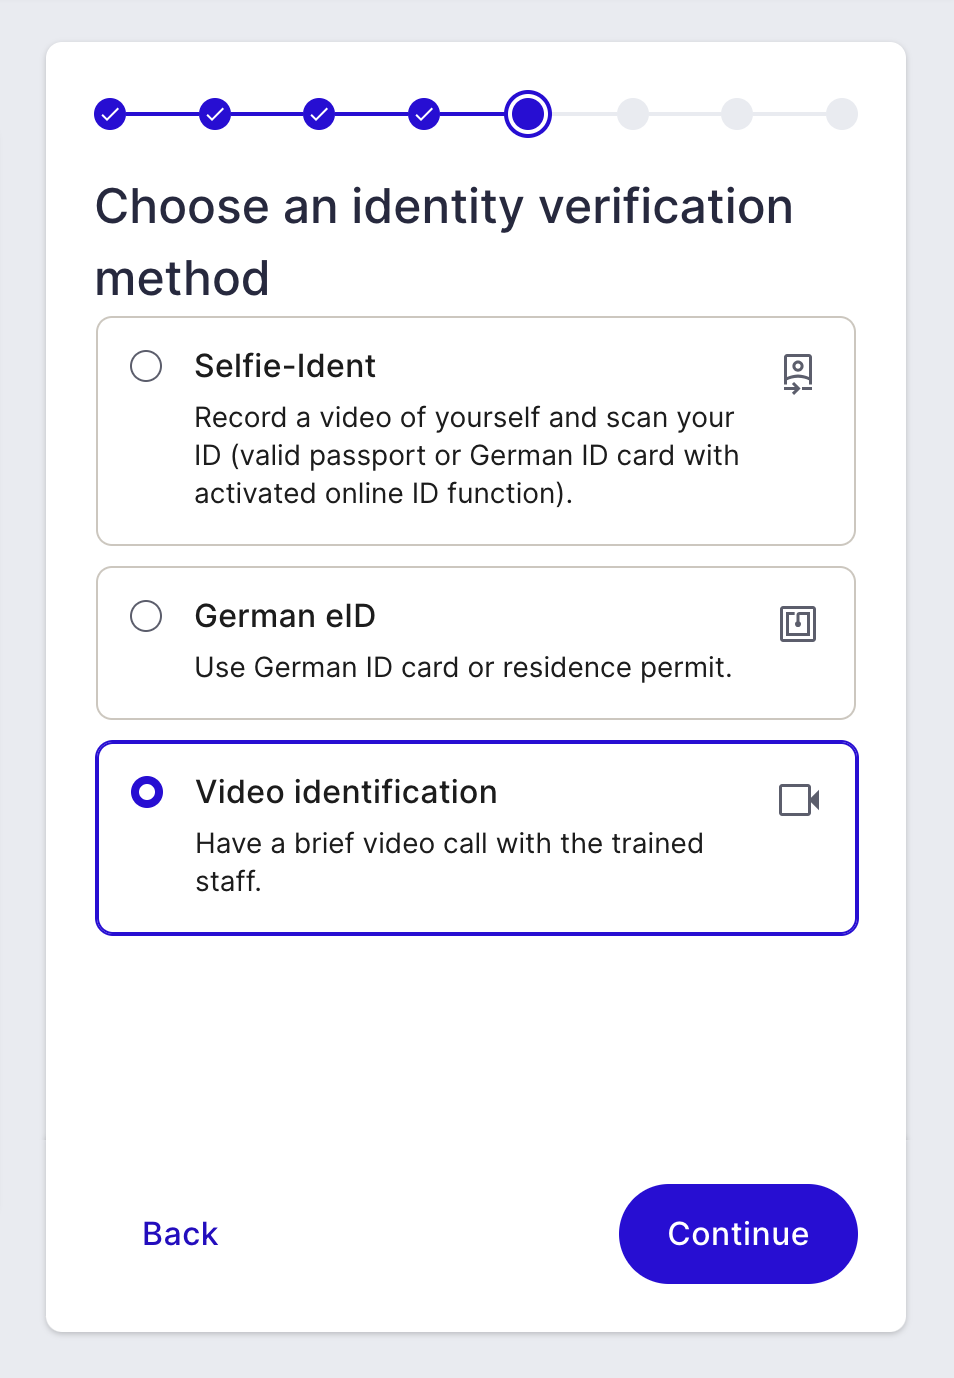
2.5. Pick an identity verification method and press "Continue" (additional information on each method is provided further down).
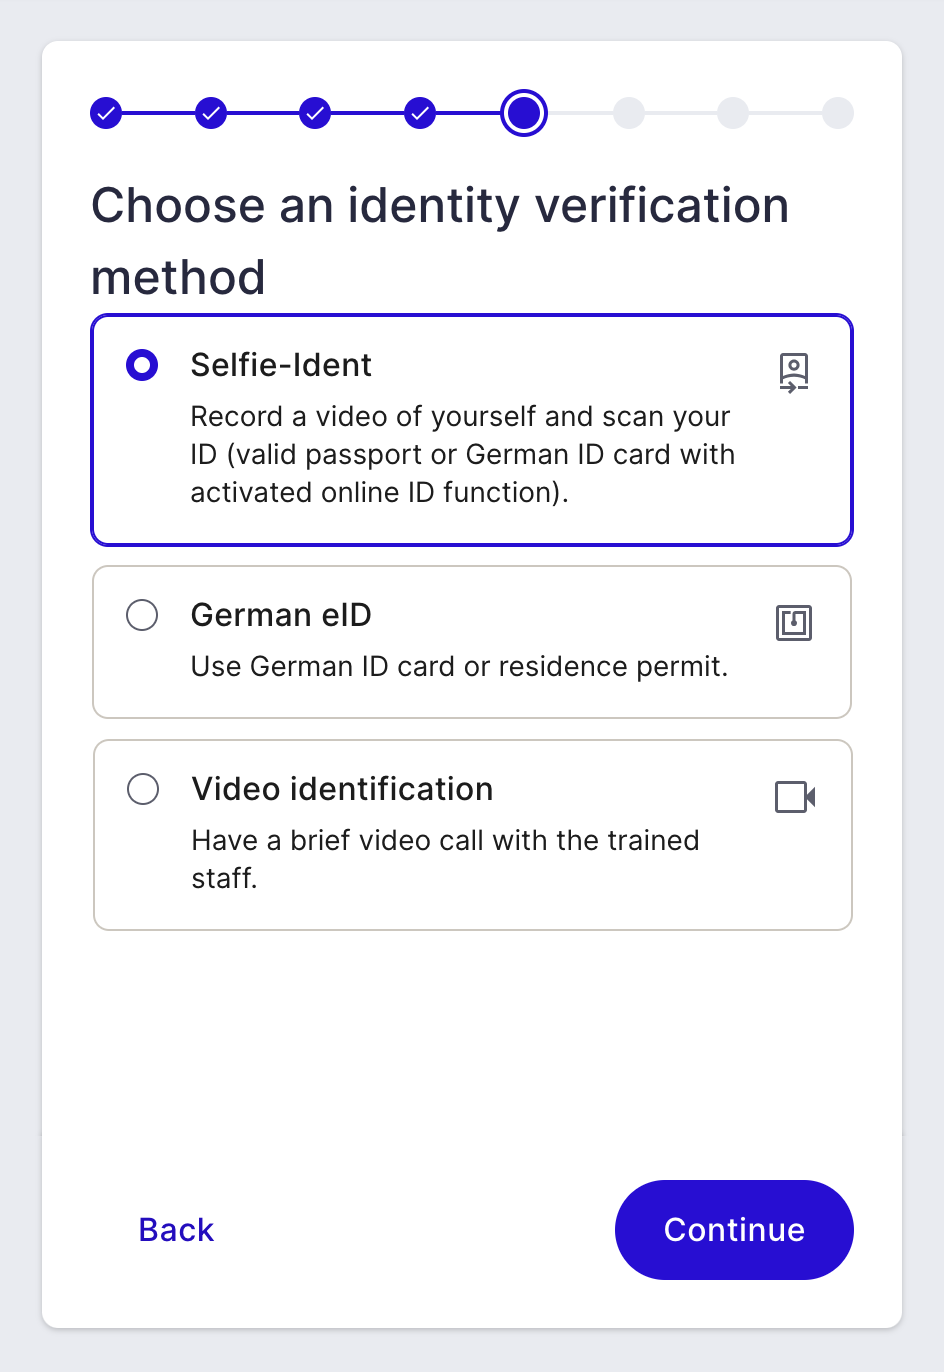
A BRIEF OVERVIEW OF EVERY AVAILABLE IDENTITY VERIFICATION METHOD
Available internationally:
- Selfie-Ident: Verify your identity with the help of your smartphone by using its NFC to scan your ID and the built-in camera to capture a video of your face. Further instructions are available → here.
- Video identification: Verify your identity through a video call service by talking to a live agent. Further instructions are available → here.
For German citizens and residents only:
- German eID: Verify your identity with a German ID card or residence permit by using a smart card reader.
2.6. Once the identification process has been completed, return to the initial signing window and press "Continue" to continue signing the document.

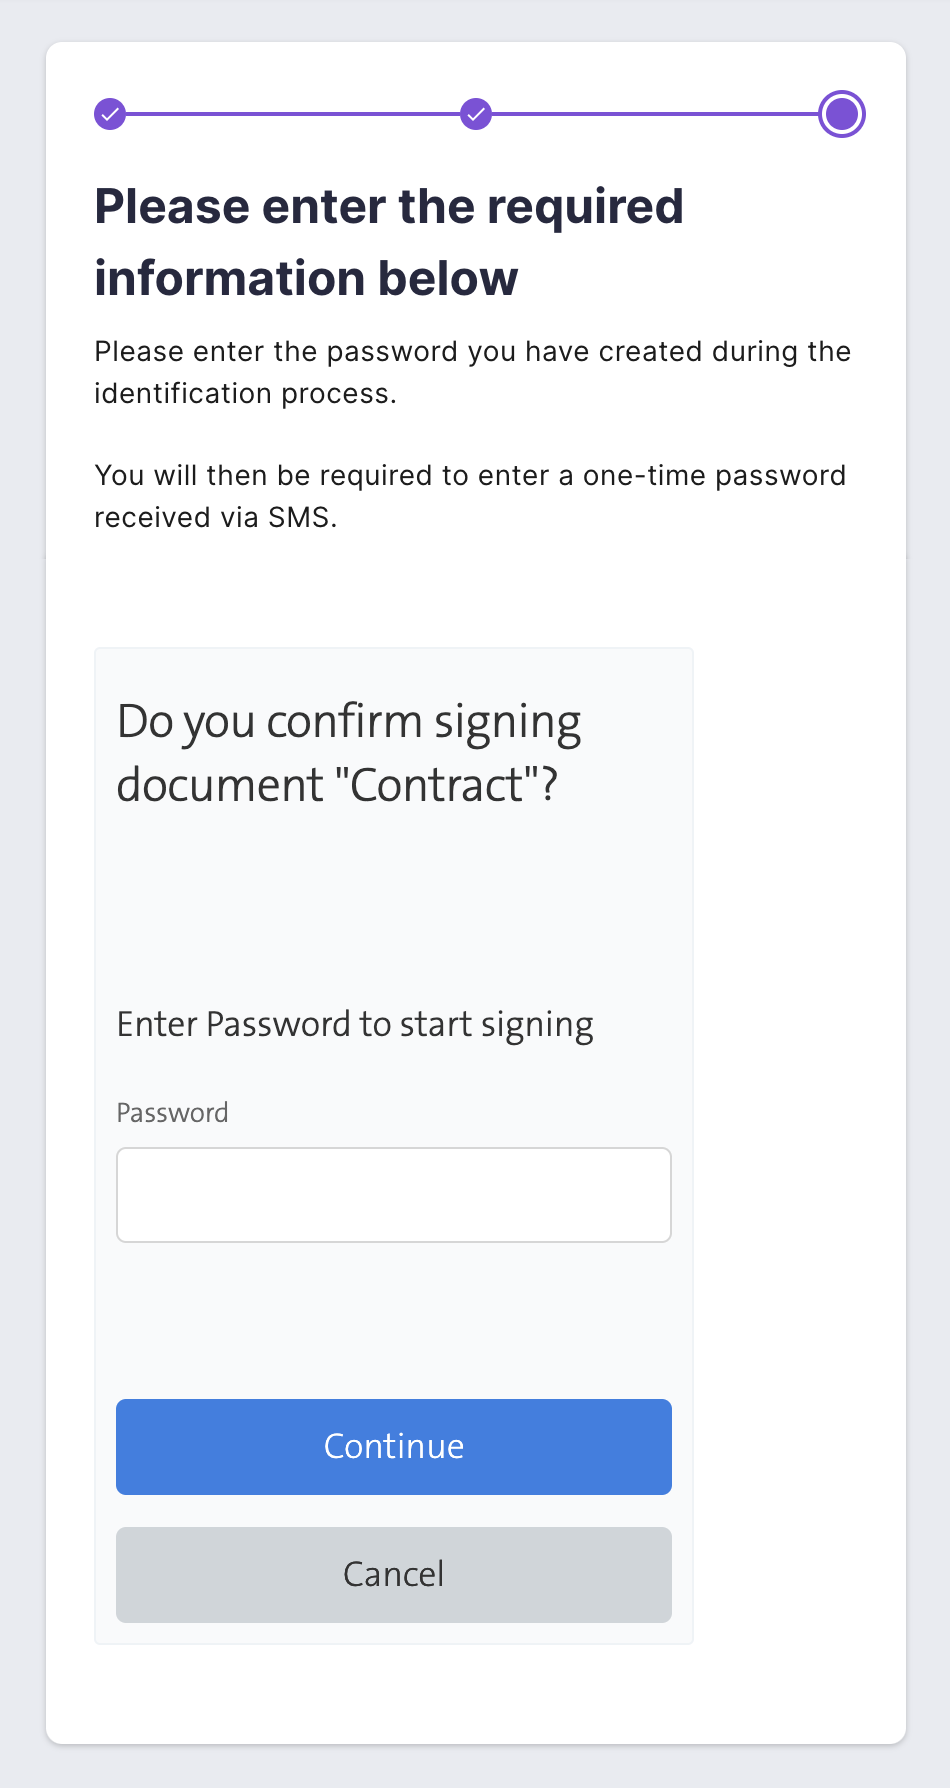
2.7. Here the system will ask to confirm your identity/the signing action in one of two ways.
Option 1: Through the Mobile ID app.
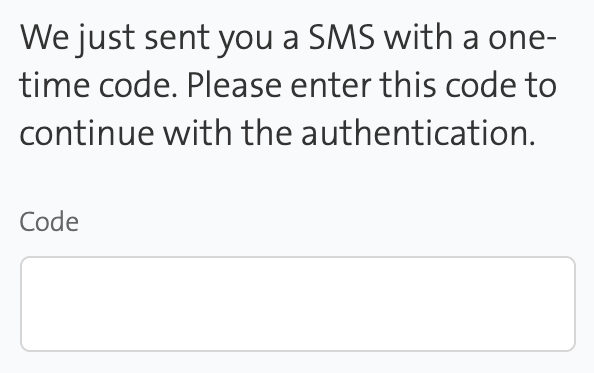
Option 2: By first entering a password that you created during your identity verification and then following it up with an OTP via sms.
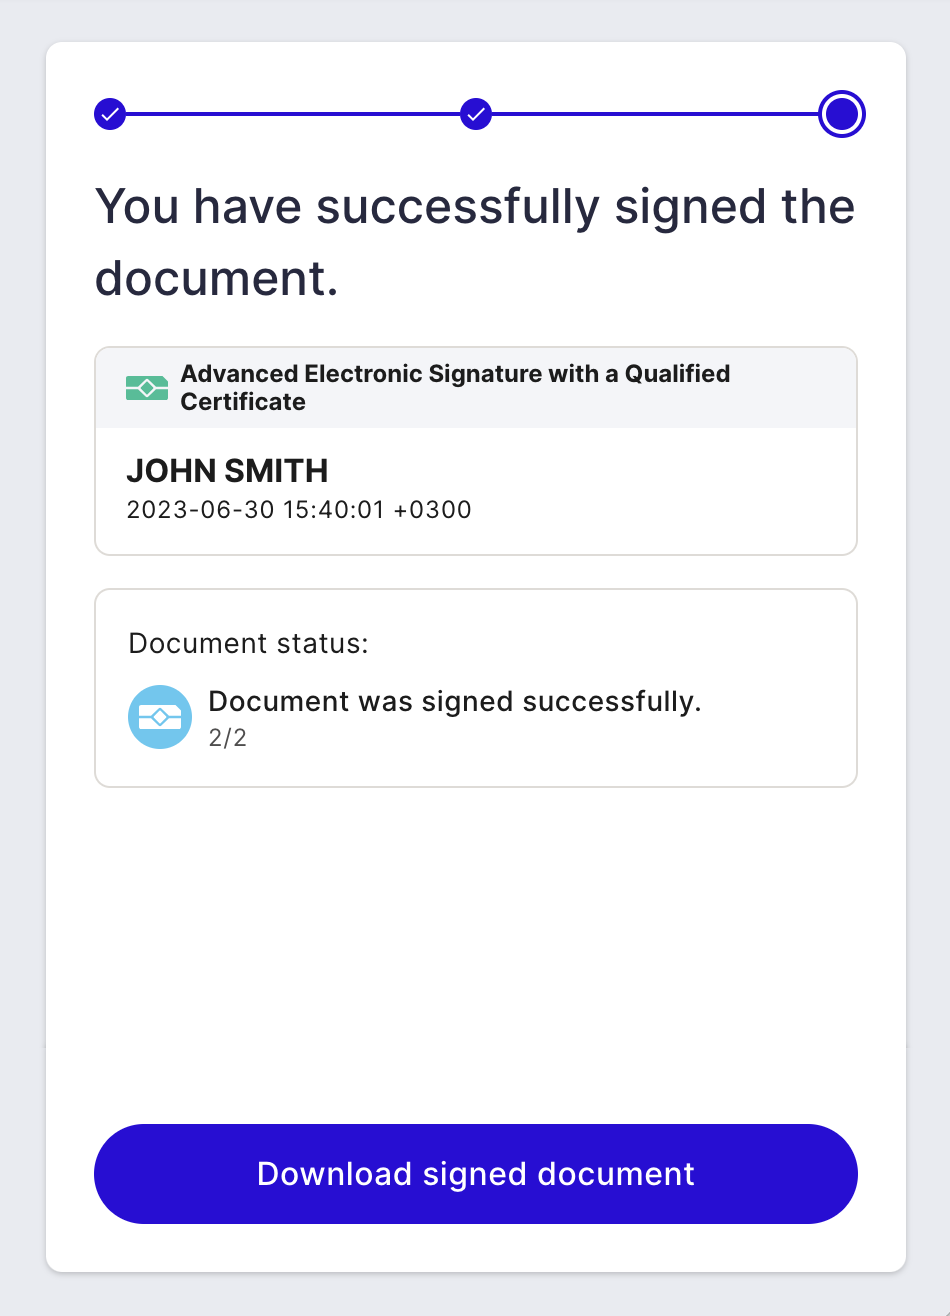
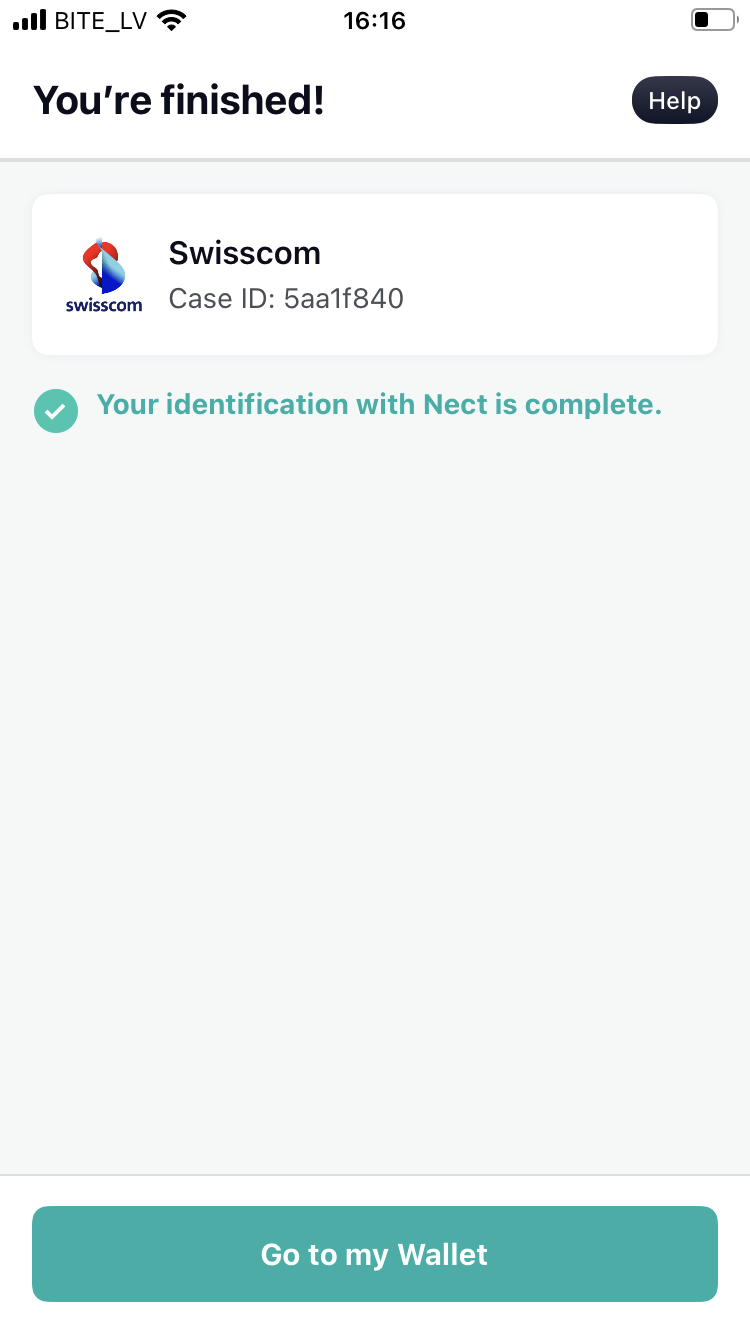
2.8. Once the document is successfully signed, a message similar to the one in the image example below will be displayed.
Additional instructions: setting up Mobile ID
Summary: A Mobile ID account can be created to simplify authentication when signing documents using Swisscom. Follow the steps below to find out how. ↓
3.0. As described in step 2.4., press "Activate Mobile ID" to get redirected to www.mobileid.ch.
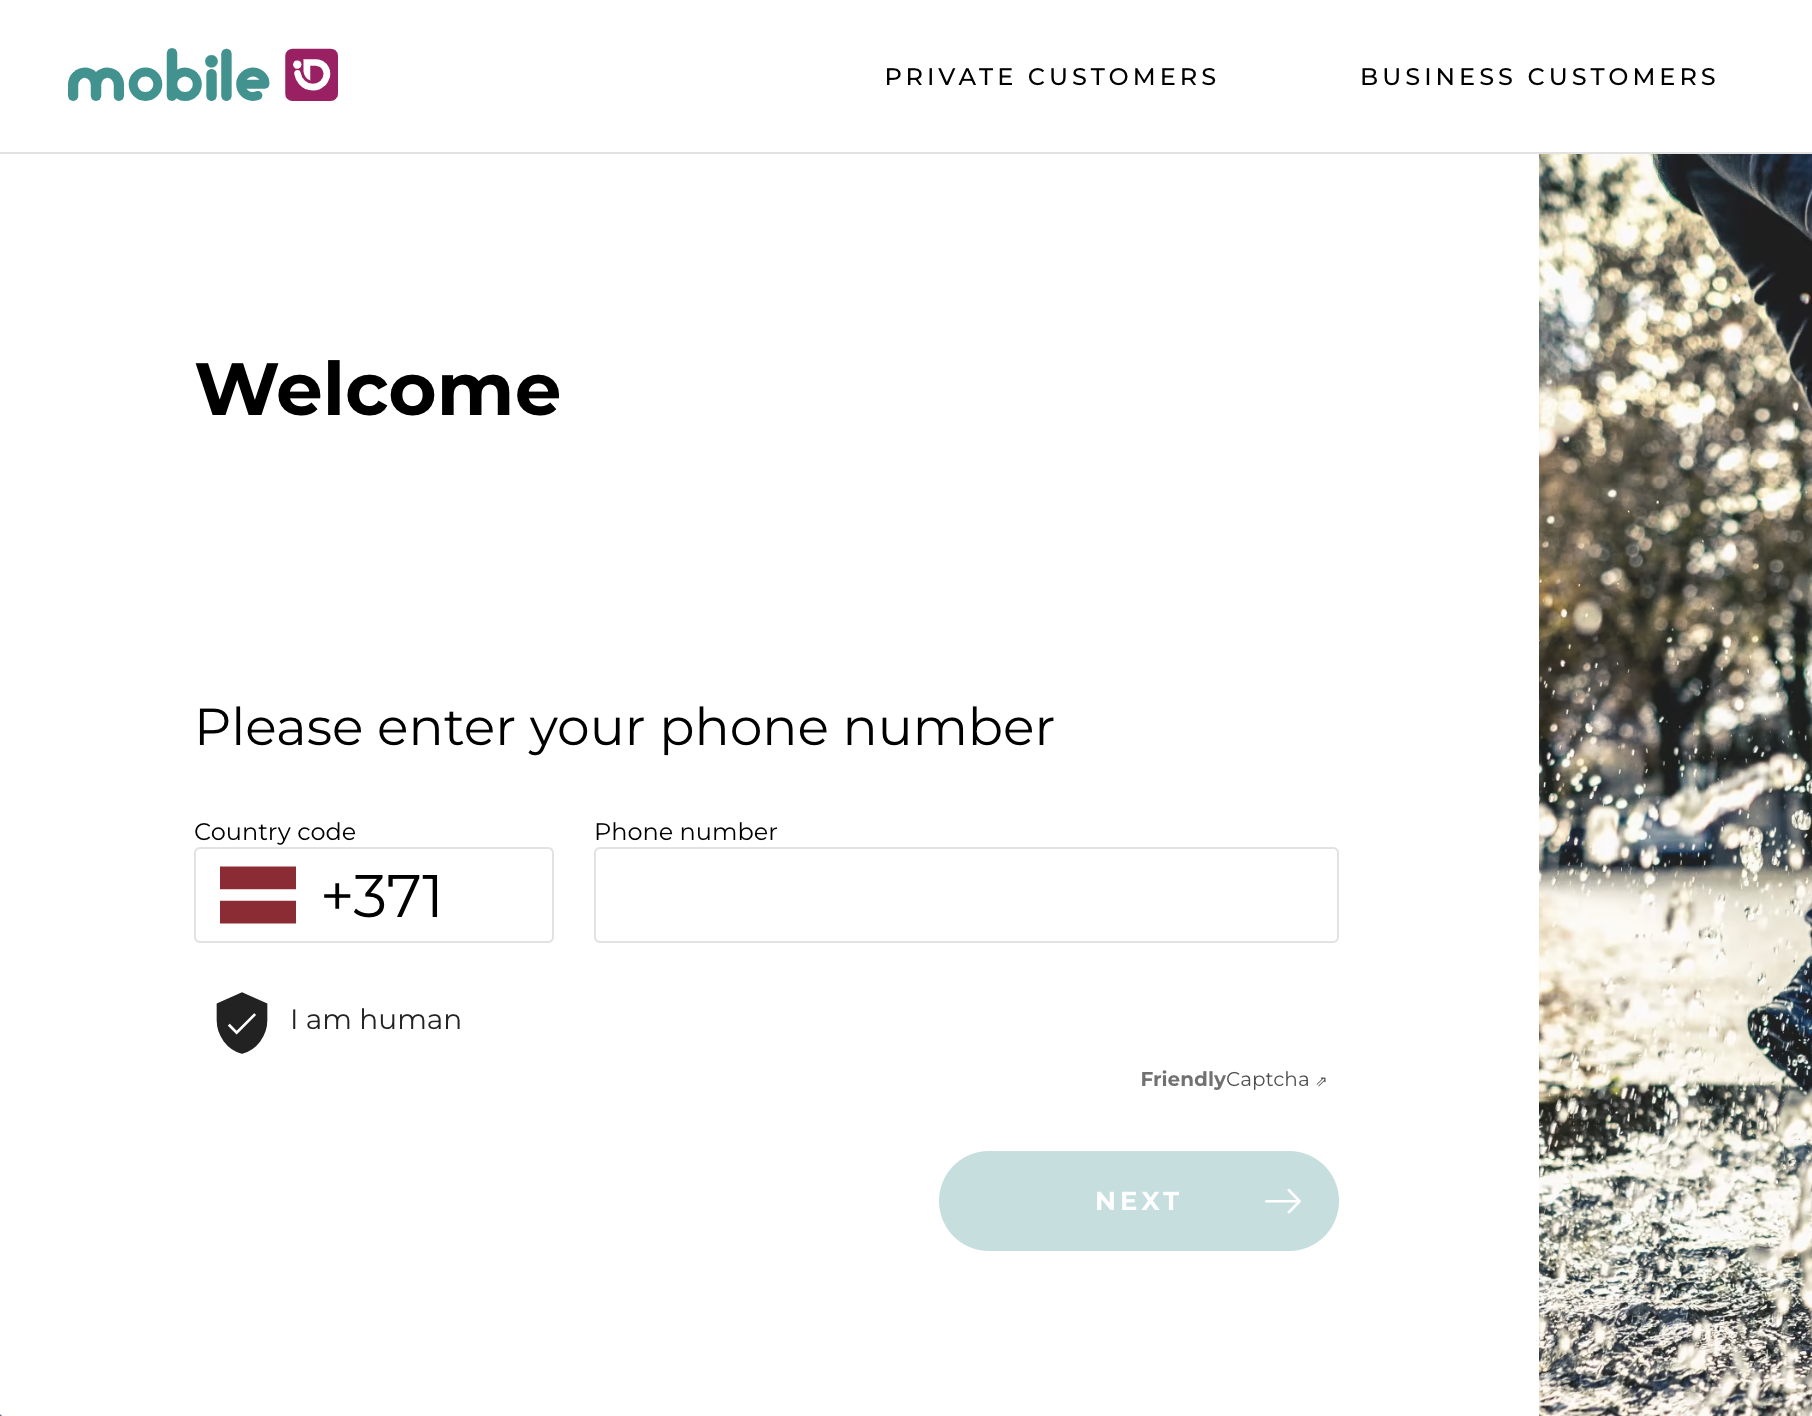
3.1. Once you're redirected to www.mobileid.ch, choose the appropriate country code, enter your phone number, and press "Next".
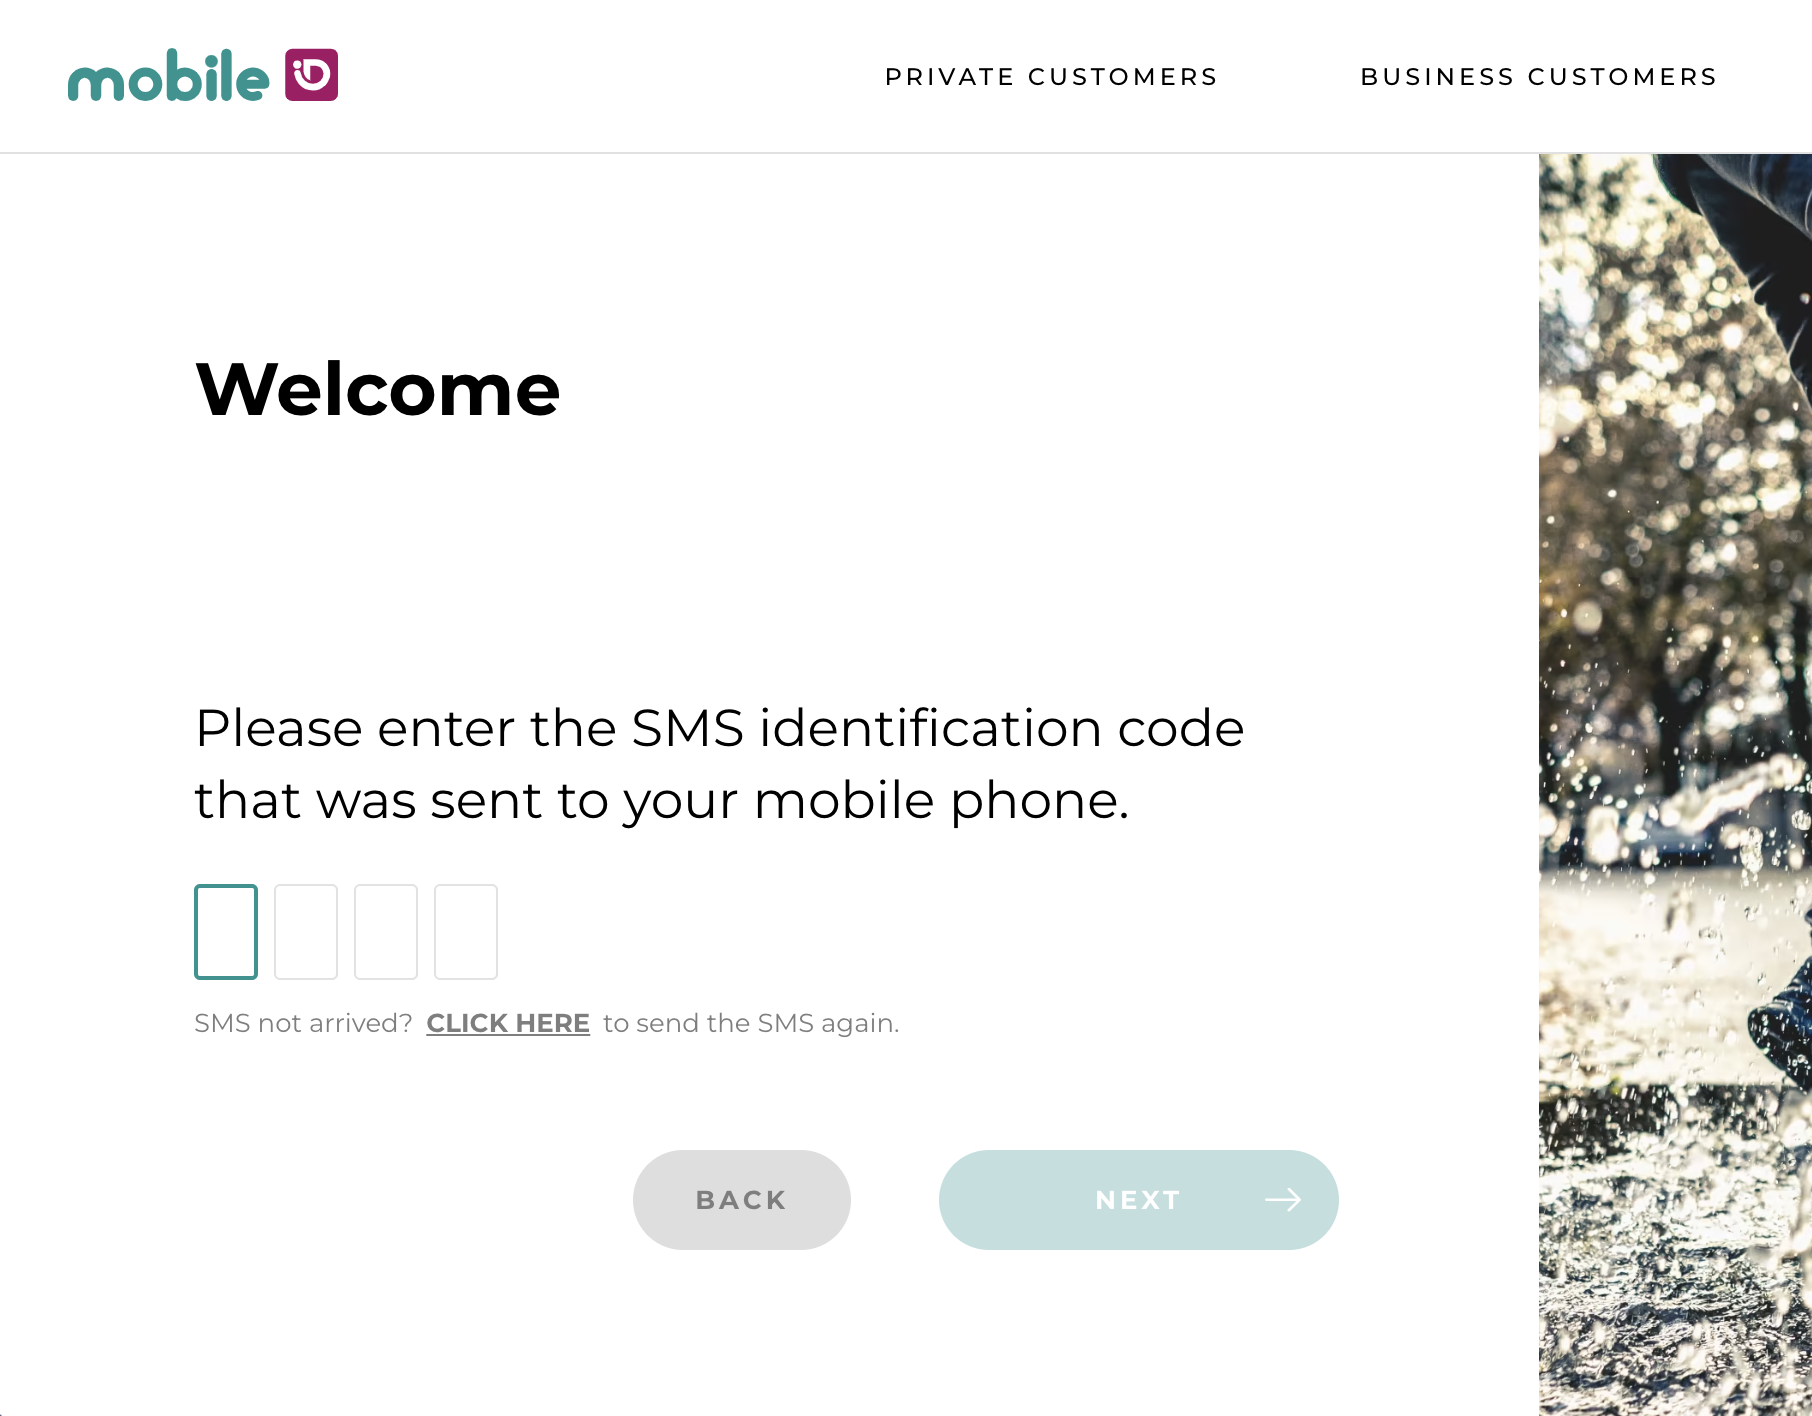
3.2. You will be sent an SMS identification code. Enter this code into the provided fields on the website and press "Next".
3.3. Then, you will be taken to the Mobile ID dashboard. In the section for "Activate Mobile ID", press "Activate".
3.4. Mark the checkbox to agree to the terms and conditions, and press "Next".
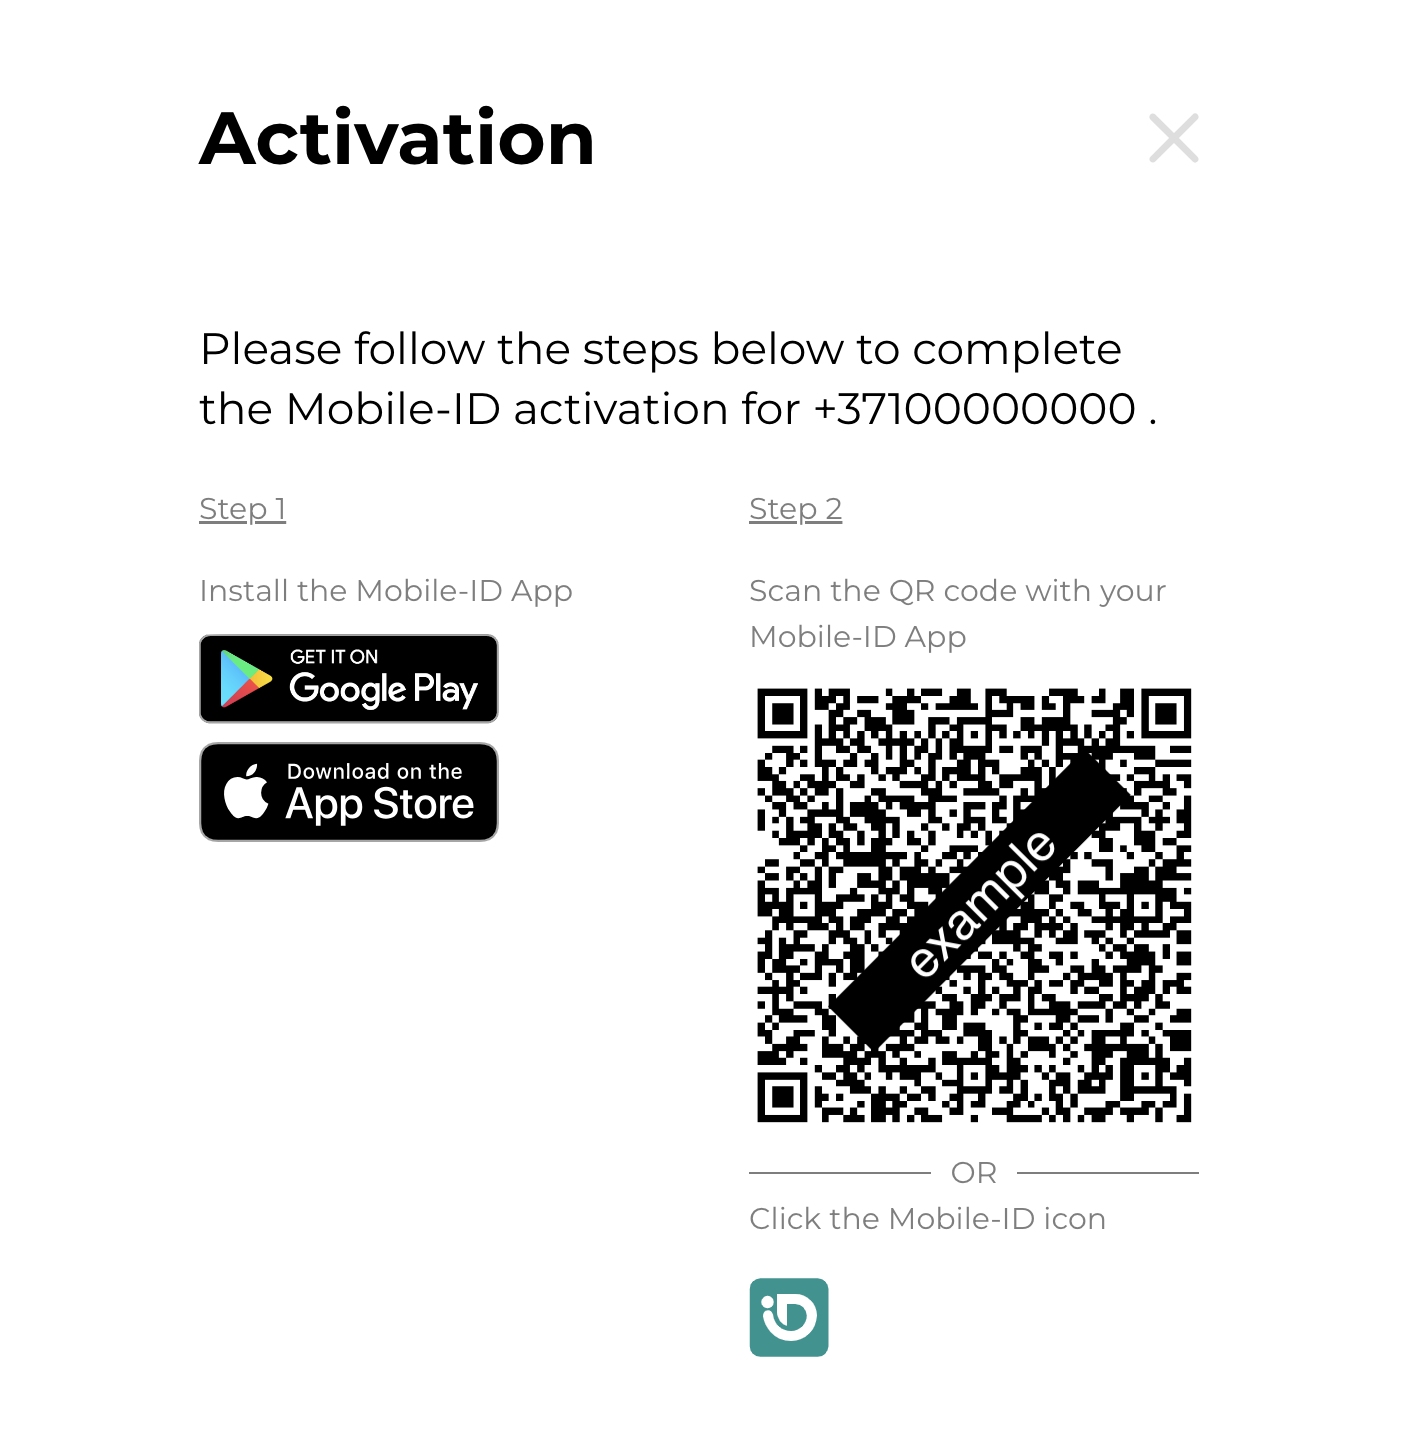
3.5. Download the Mobile ID app on your phone and use it to scan the QR code, as seen in the example image below.
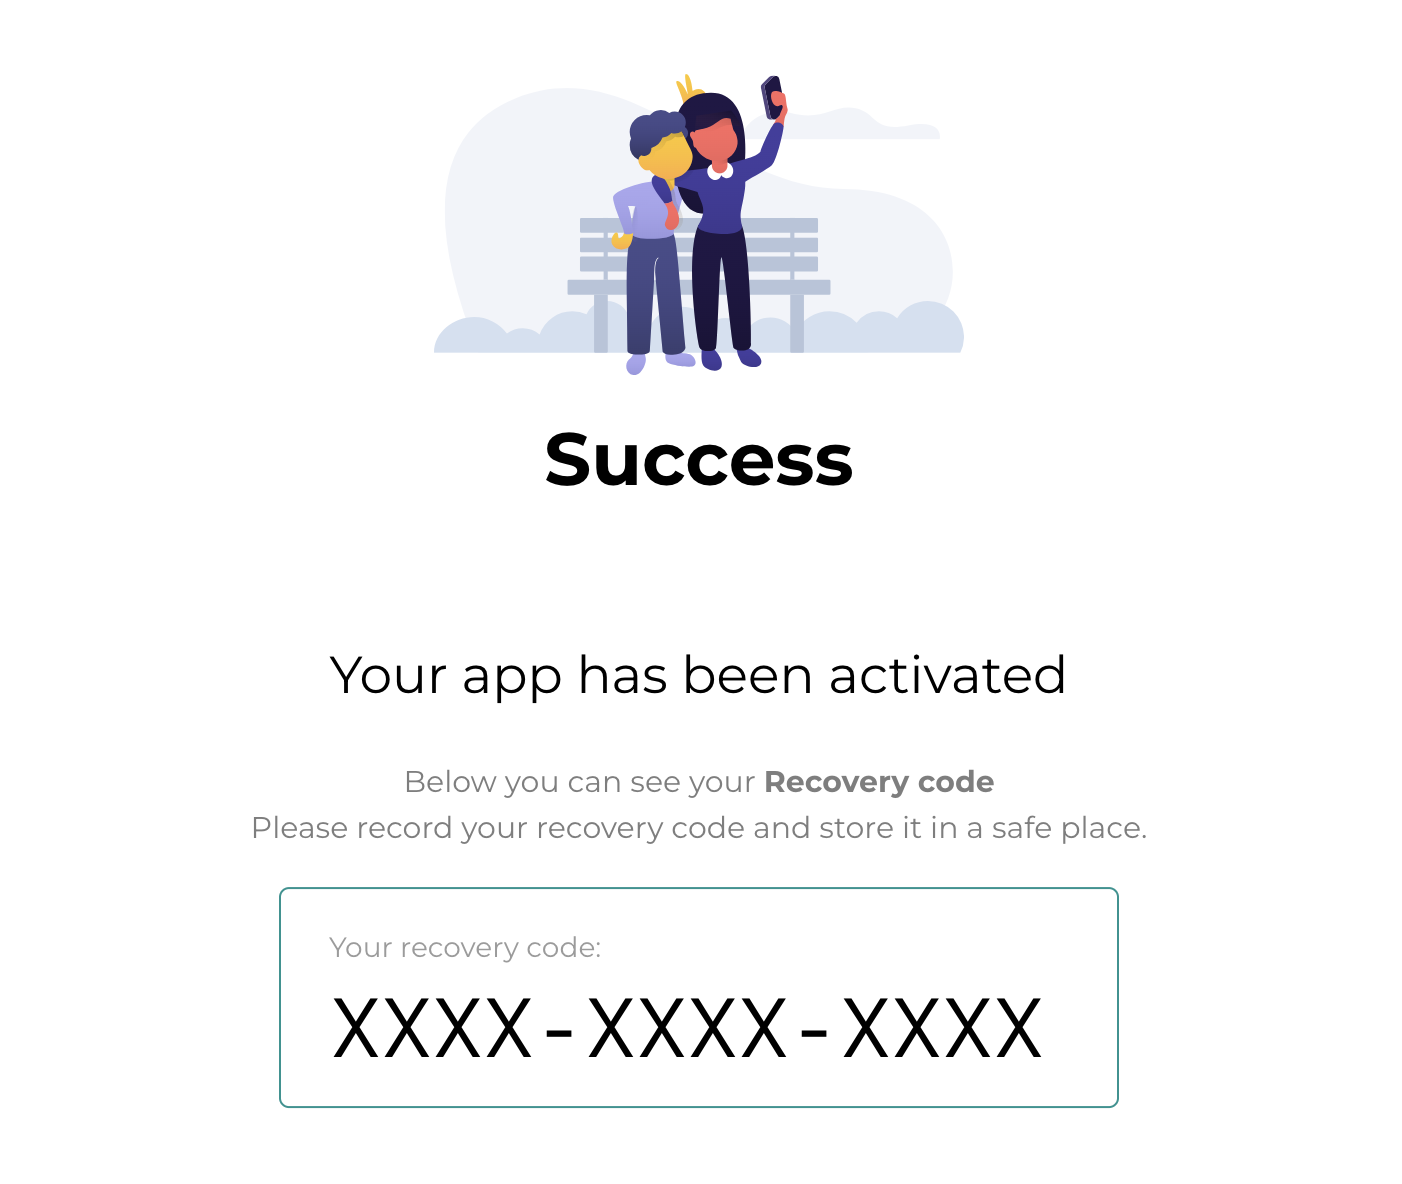
3.6. After scanning the QR code, the Mobile ID account will be activated, and the dashboard will display a recovery key that can be saved for future reference.
Additional instructions: verifying your identity with Selfie-Ident
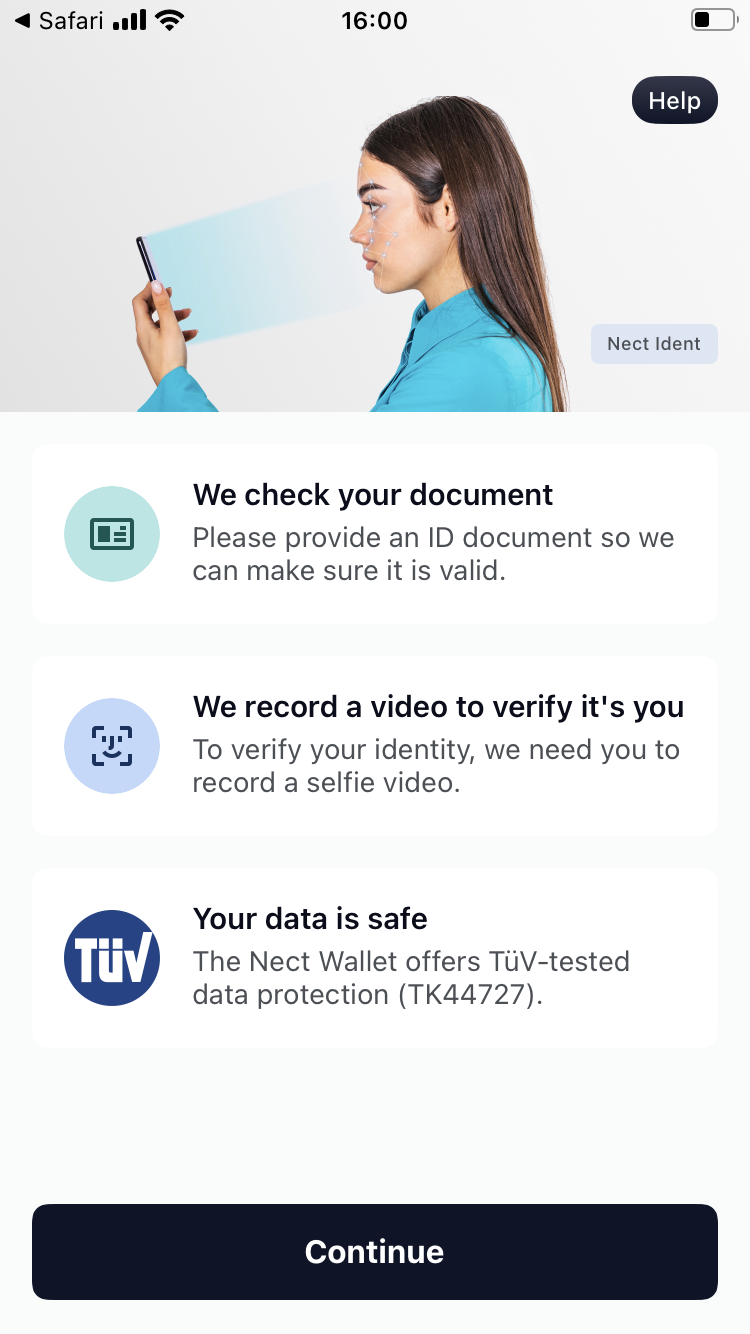
Summary: Selfie-Ident allows you to verify your identity with the help of your smartphone by using its NFC functionality to scan your ID and the built-in camera to capture a video of your face through the Nect Wallet app. For this method, you will need either a valid German ID card or a passport from one of the supported countries. For further instructions, follow the steps below. ↓
Note: The following steps might slightly differ in the provided order and content for each user, depending on the chosen type of personal ID and each user's way of interacting with the app.
4.0. When choosing an identity verification method, pick "Selfie-Ident" and press "Continue".
Familiarize yourself with the requirements of the process and press "Start".
4.1. You will then be redirected to https://jump.nect.com/. Here you will be asked to begin the identification process by either scanning the QR code on the left or by sending yourself an SMS with a link on the right.

If the system detects that you do not have the Nect Wallet app, you will be asked to download it from the App Store or Google Play Store.
4.2. Once the app has been downloaded and opened, press "Get started".
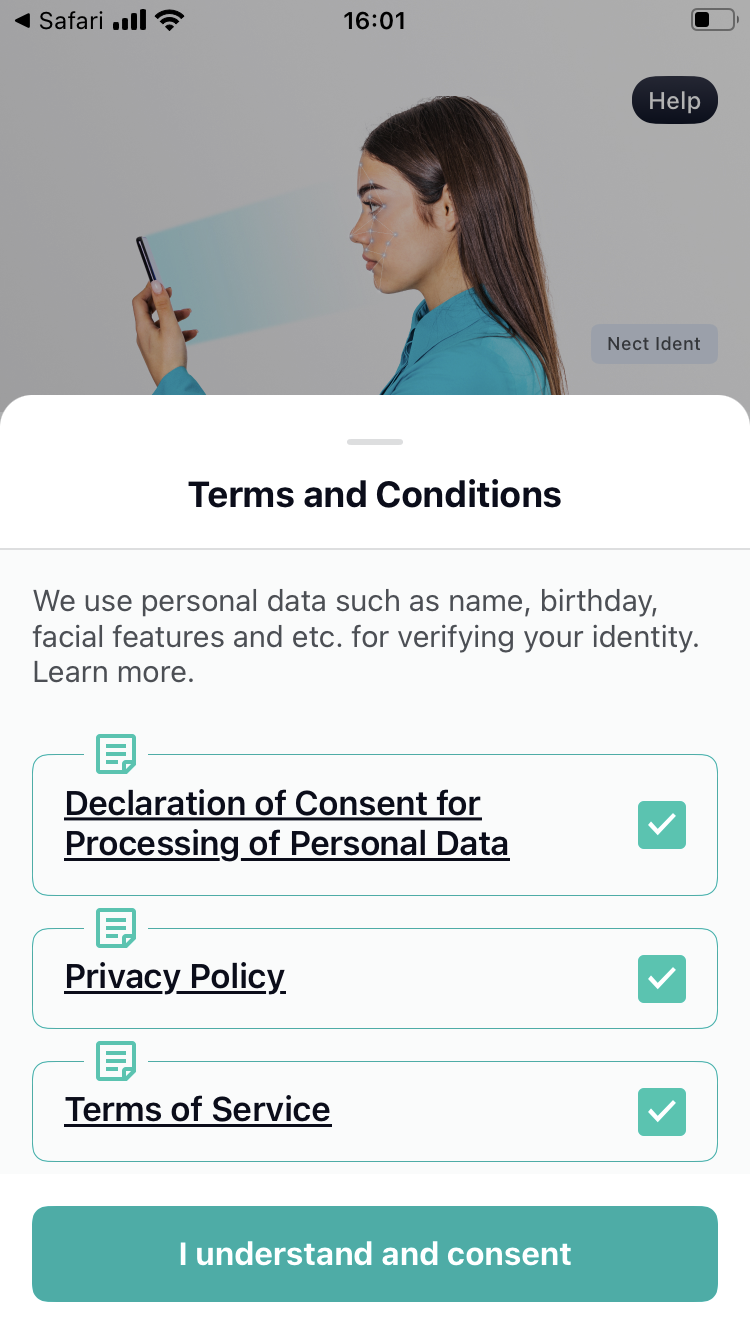
4.3. Familiarize yourself with the requirements of the process and press "Continue".
Then mark the checkboxes to agree to the terms and conditions, and press "I understand and consent".
4.4. In the next step, you will be shown a video tutorial. If you choose to skip the video, you will be shown written instructions on how to correctly scan your ID instead. Watch the video tutorial or get familiar with the written instructions and press "Continue".
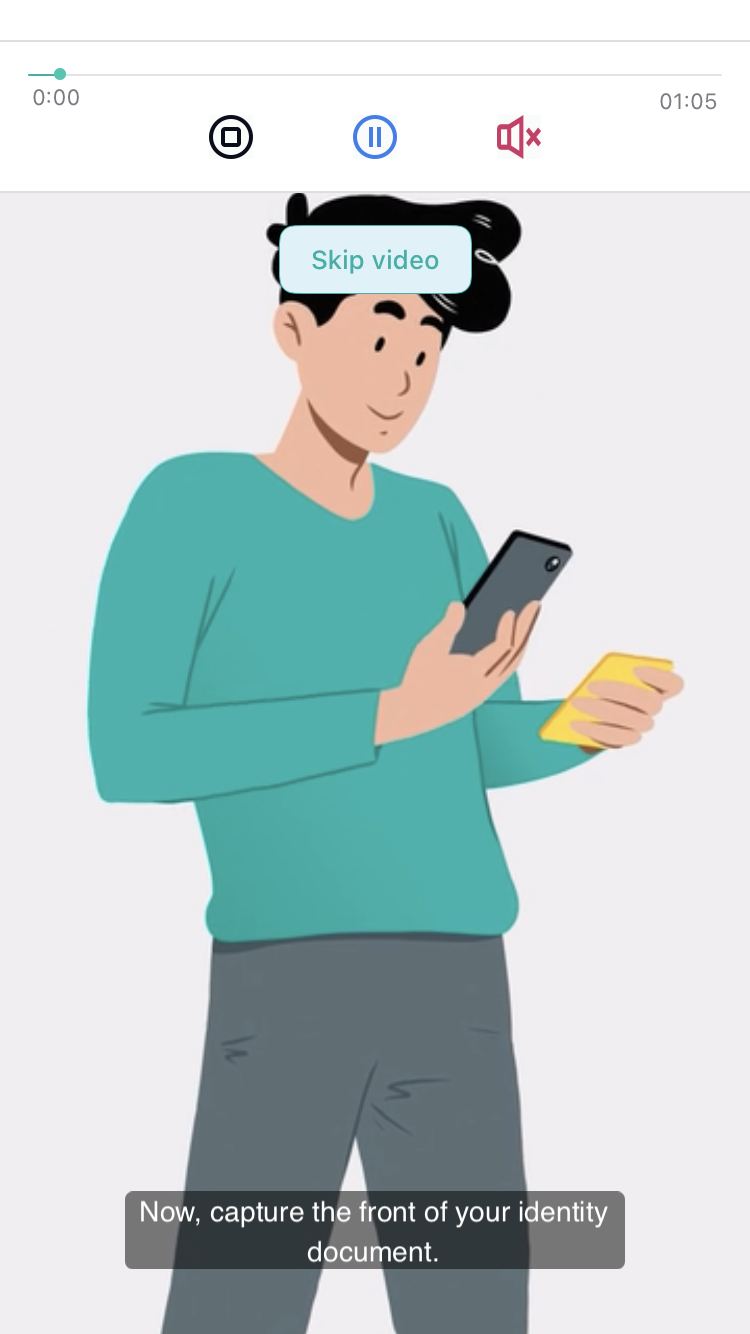
4.5. Get familiar with the next set of instructions and press "Start recording".
Note: Please note that the Nect Wallet app might list a broader range of supported countries/IDs; however, not all of them are supported by Swisscom itself; therefore, they cannot be used to create this signing tool. Before recording your chosen ID, please consult the list of supported countries at the beginning of this article to ensure a successful registration process.
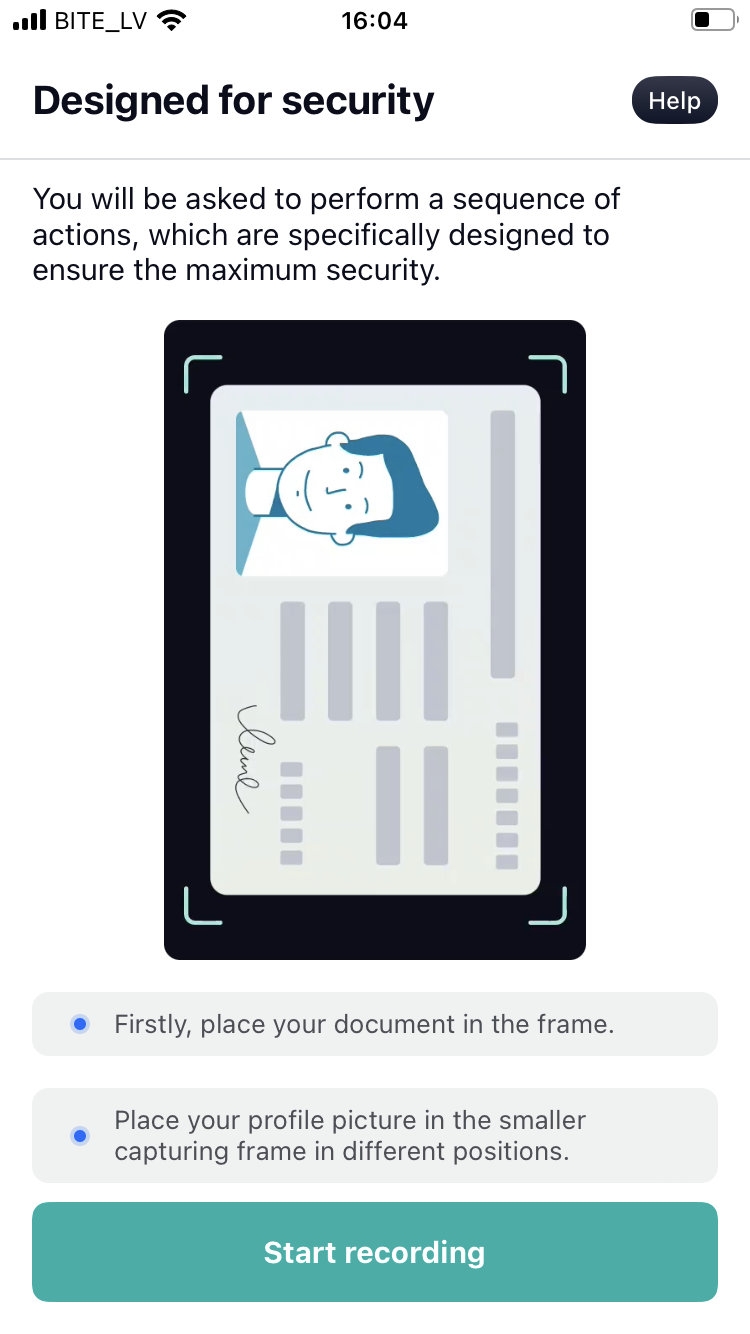
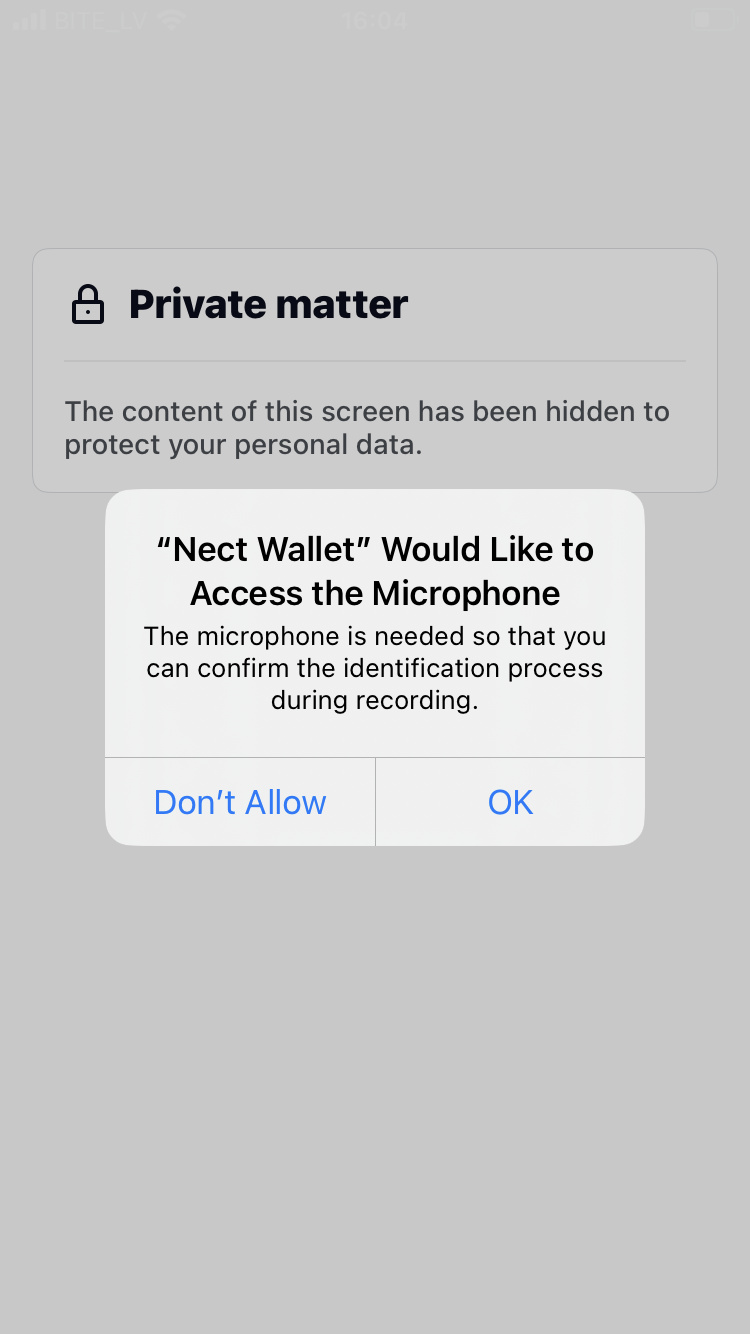
Before the recording begins, you might be required to allow Nect Wallet to access your microphone and/or camera.
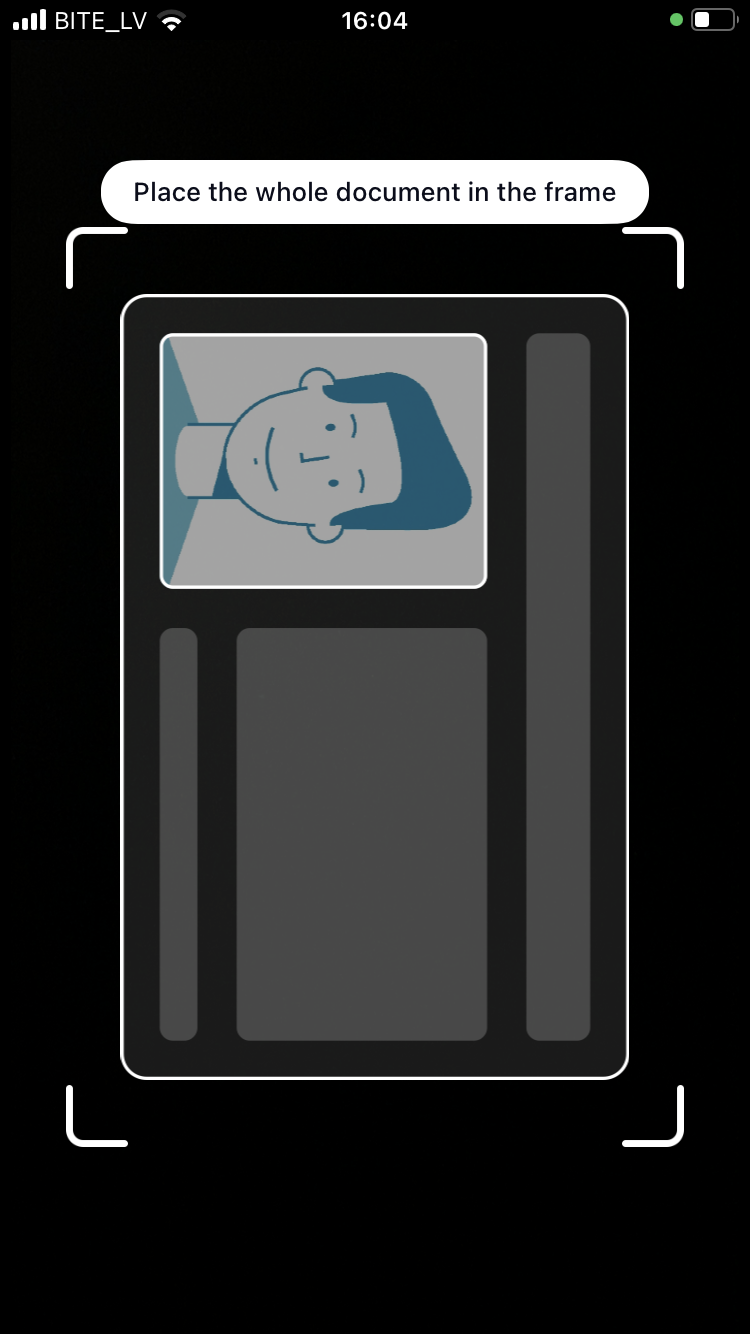
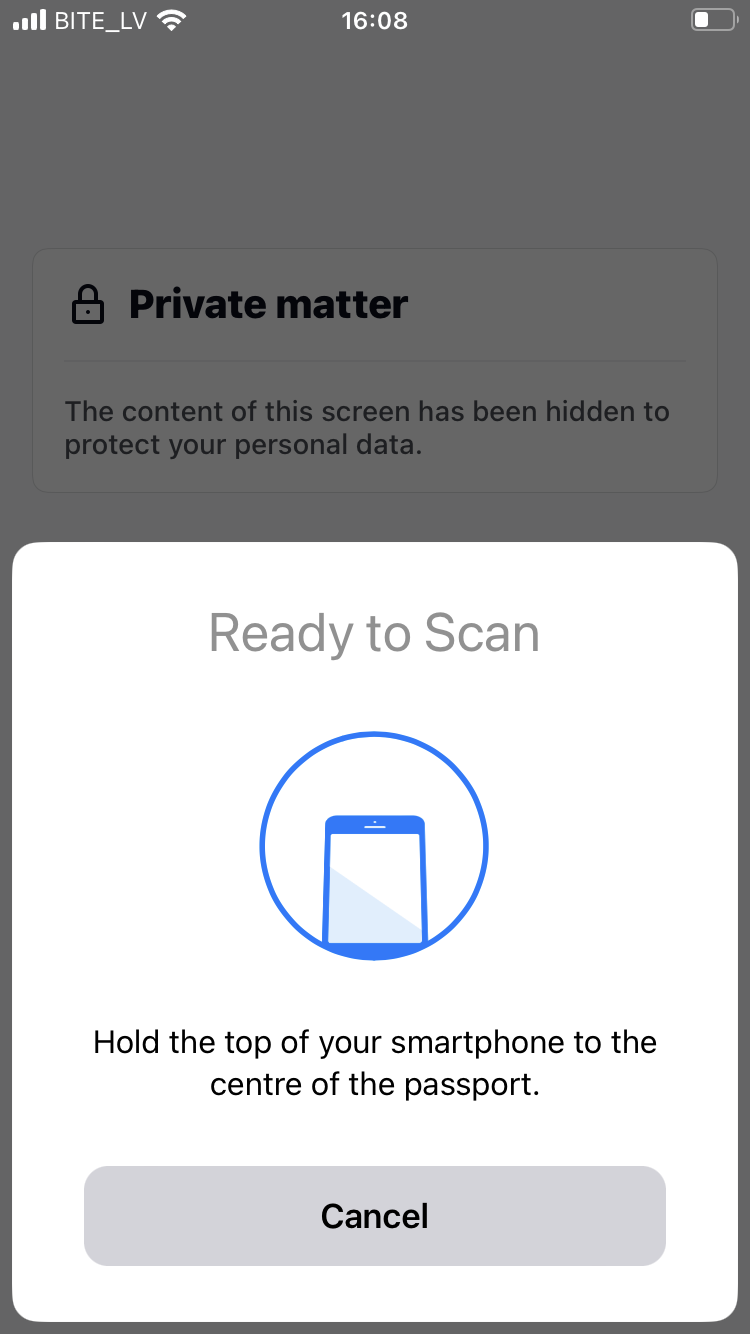
4.6. Once the recording begins, follow the instructions on the screen to scan the front of your document. For ID cards, you will also be required to scan the back of your document.
Note: For demonstration purposes, the camera screen has been blacked out in the following screenshot example.
4.7. After the recording is completed, biometric ID holders will be given an optional choice to scan the NFC chip as an added security measure. Press "Continue". Alternatively, you can press "Skip" to move on from the NFC step (in that case, continue to step 4.10.).
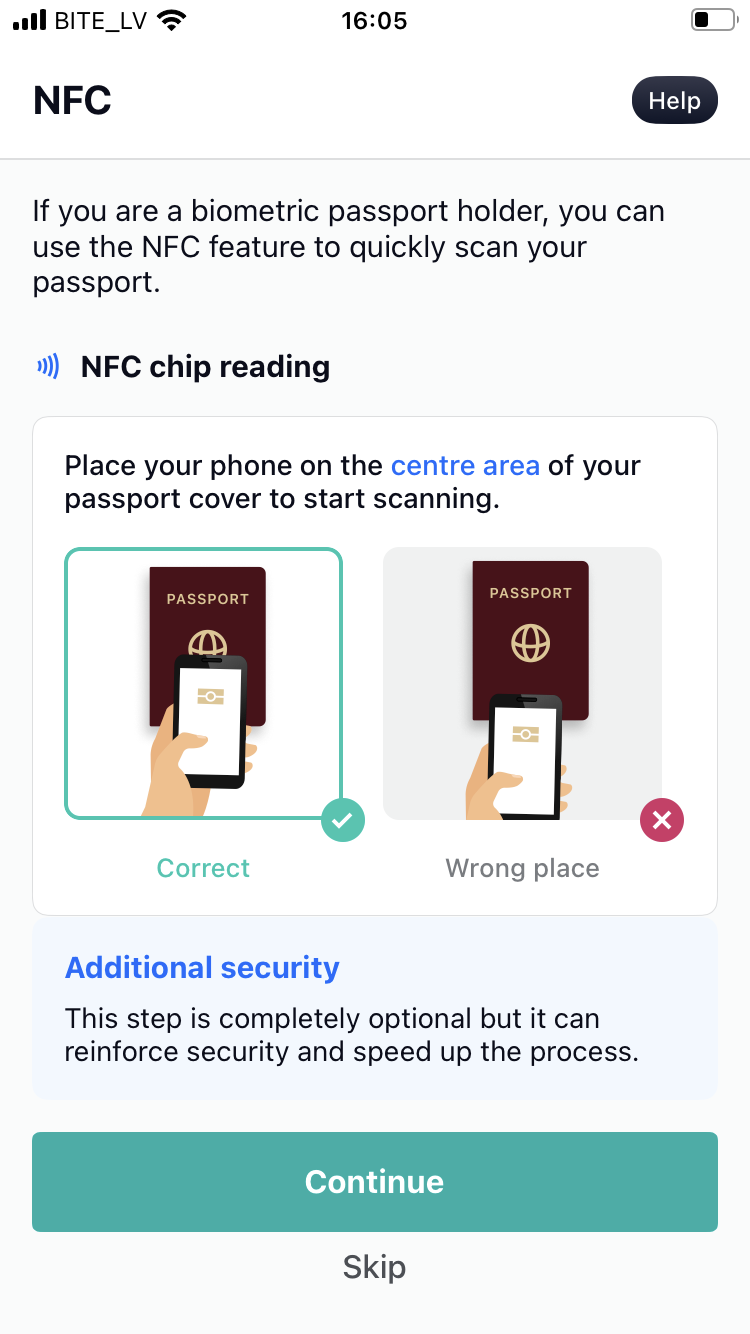
4.8. If you didn't skip the previous step, double-check your data. Make corrections if necessary and press "Continue". Alternatively, you can still press "Skip" to move on from the NFC step.
4.9. If you didn't skip the previous two steps, follow the instructions on the screen to scan the NFC chip in your ID.
Note: To successfully scan the NFC chip, phone cases and passport covers should be removed, and the smartphone should be directly placed on top of the passport. If you're experiencing difficulties scanning the chip, experiment with placing the smartphone on different parts of the document.
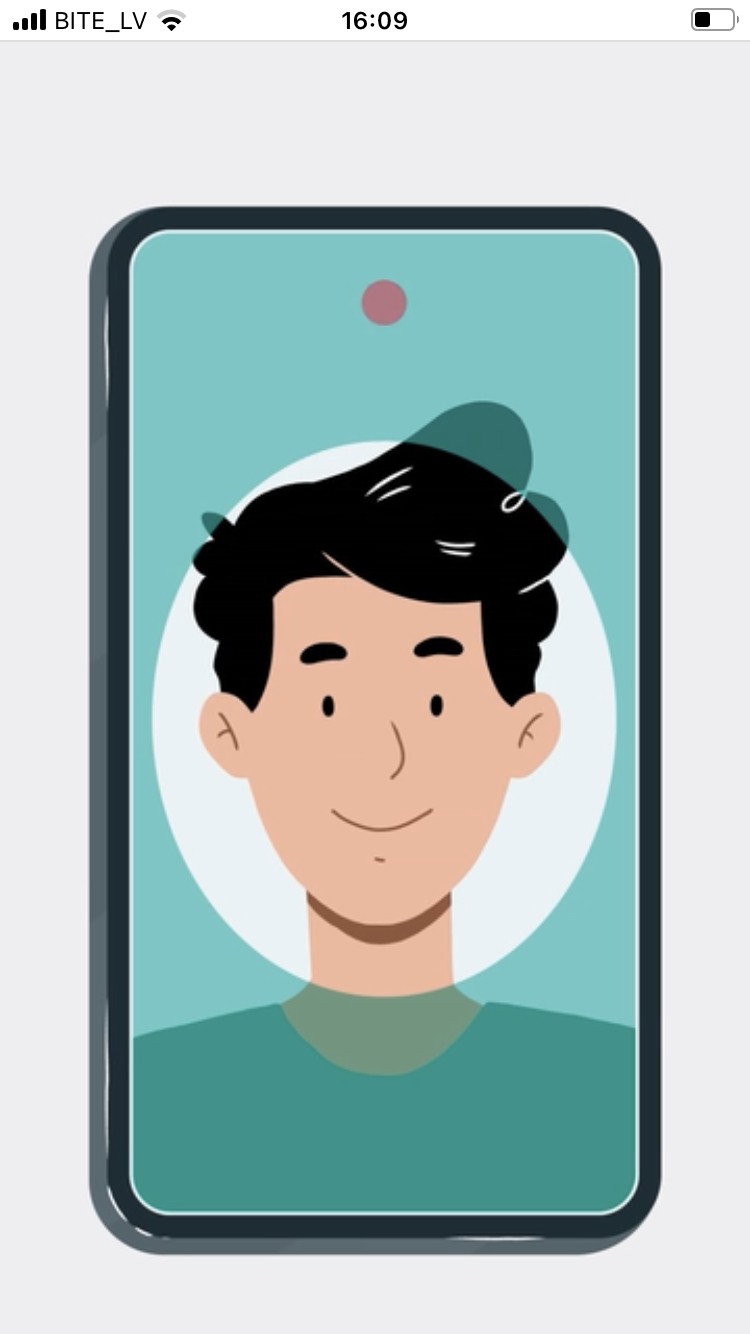
4.10. Next, you will be shown another video tutorial. If you choose to skip the video, you will be shown written instructions on how to correctly do a face scan instead. Watch the video tutorial or get familiar with the written instructions and press "Continue".
4.11. Record a video of yourself and repeat aloud the two words shown on the screen. Repeating these words is necessary to ensure that you are a living person and not just a mask or a photo being held in front of the camera.
Note: For demonstration purposes, the camera screen has been blacked out in the following screenshot example.

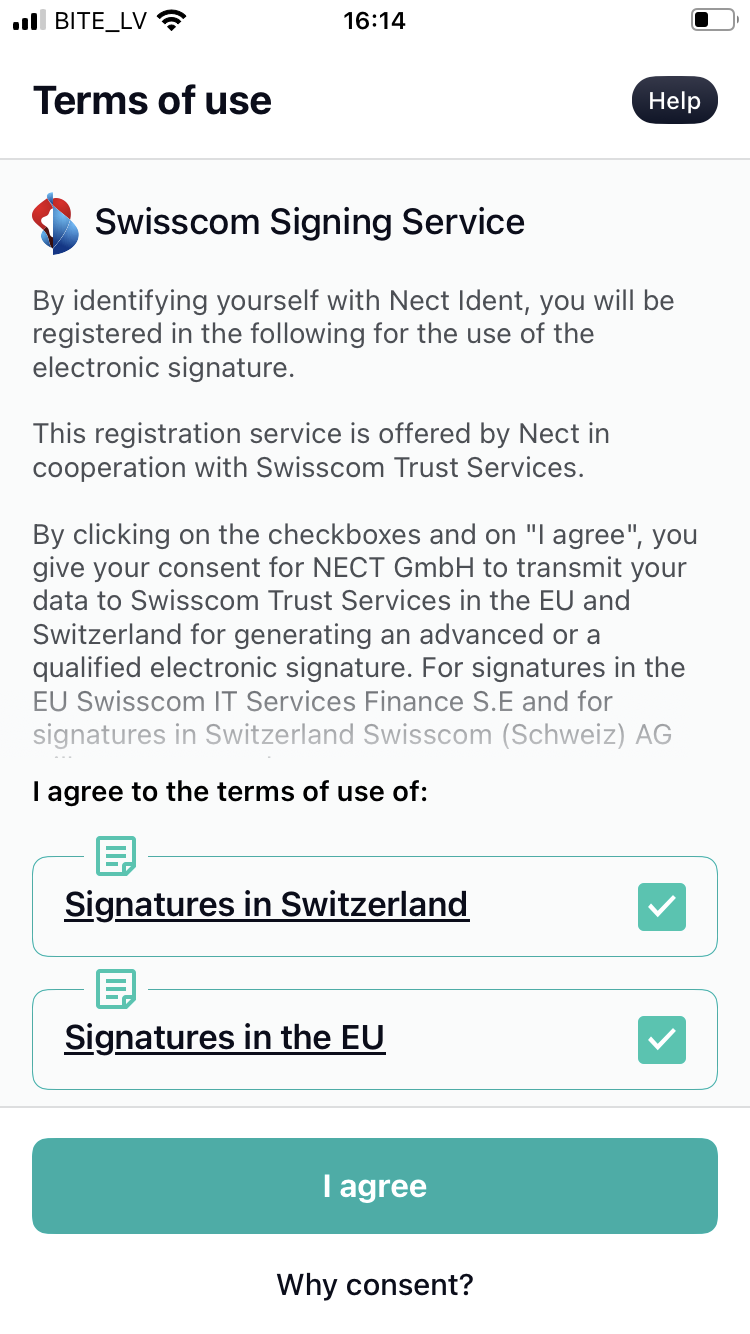
4.12. Once the recording is completed, enter your full name in the provided field and press "Continue".

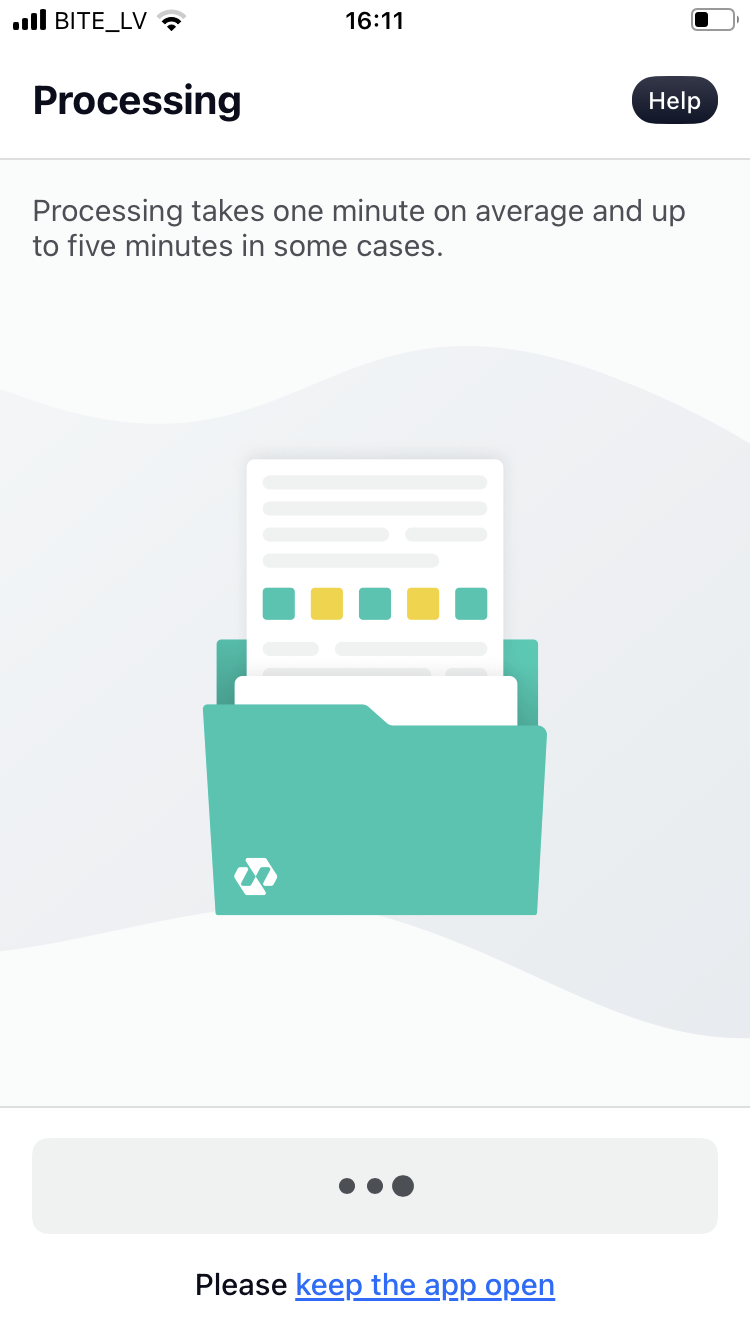
4.13. Wait about 1-5 minutes for your data to be processed.
4.14. Mark the checkboxes to agree to the terms of use, and press "I agree".
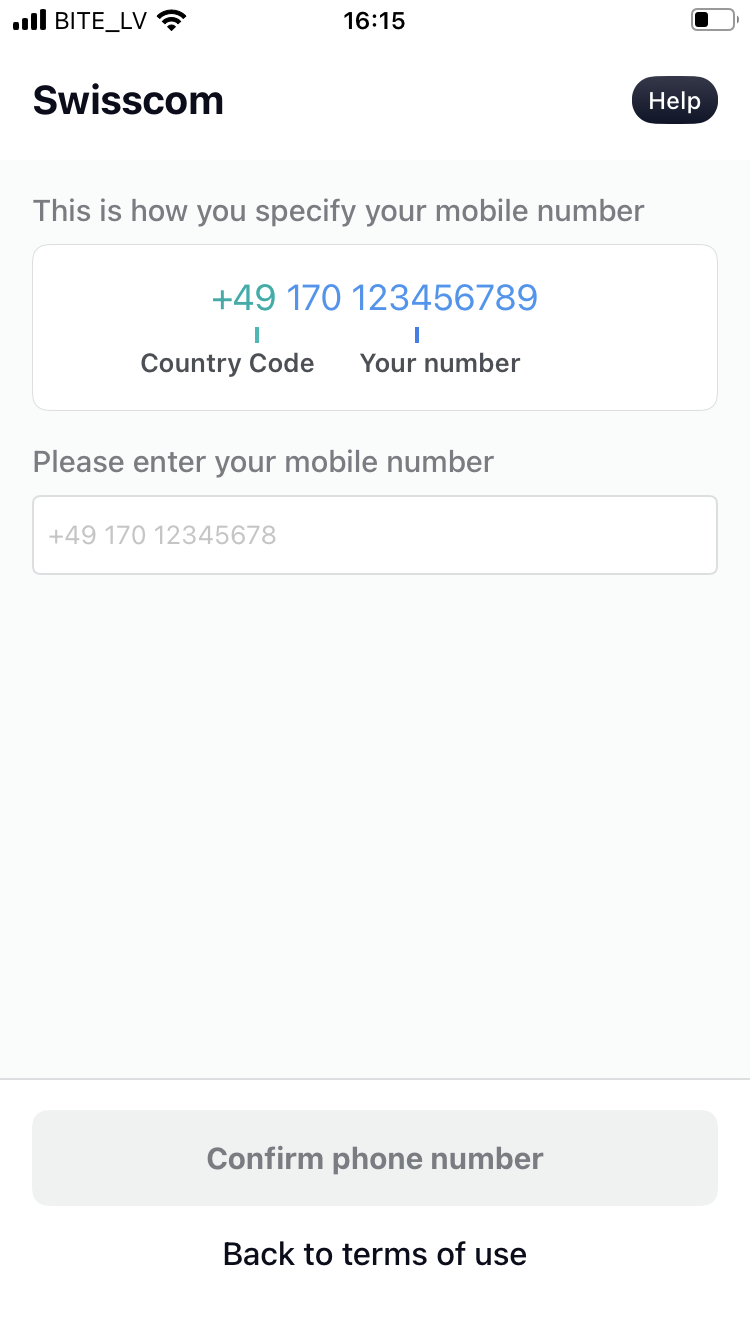
4.15. Enter your phone number in the provided field and press "Confirm phone number".
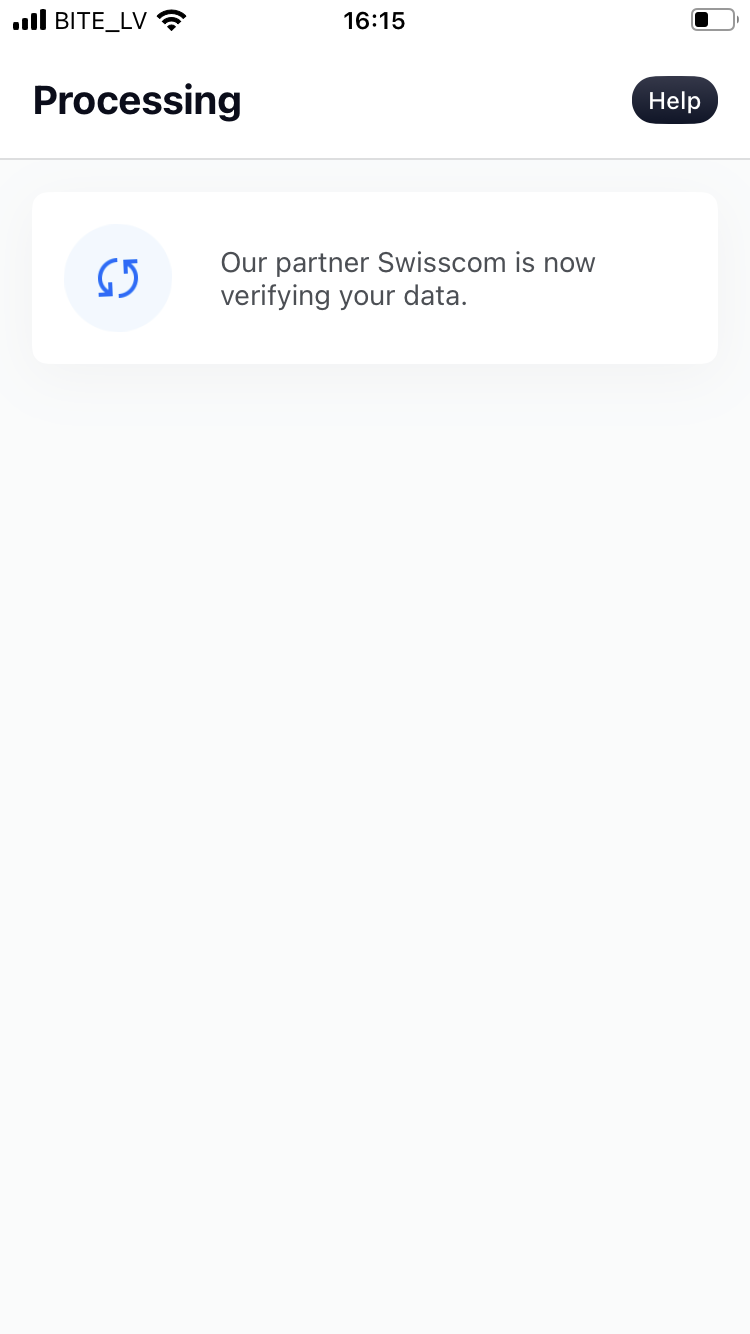
Wait for Swisscom to process your data, if necessary.
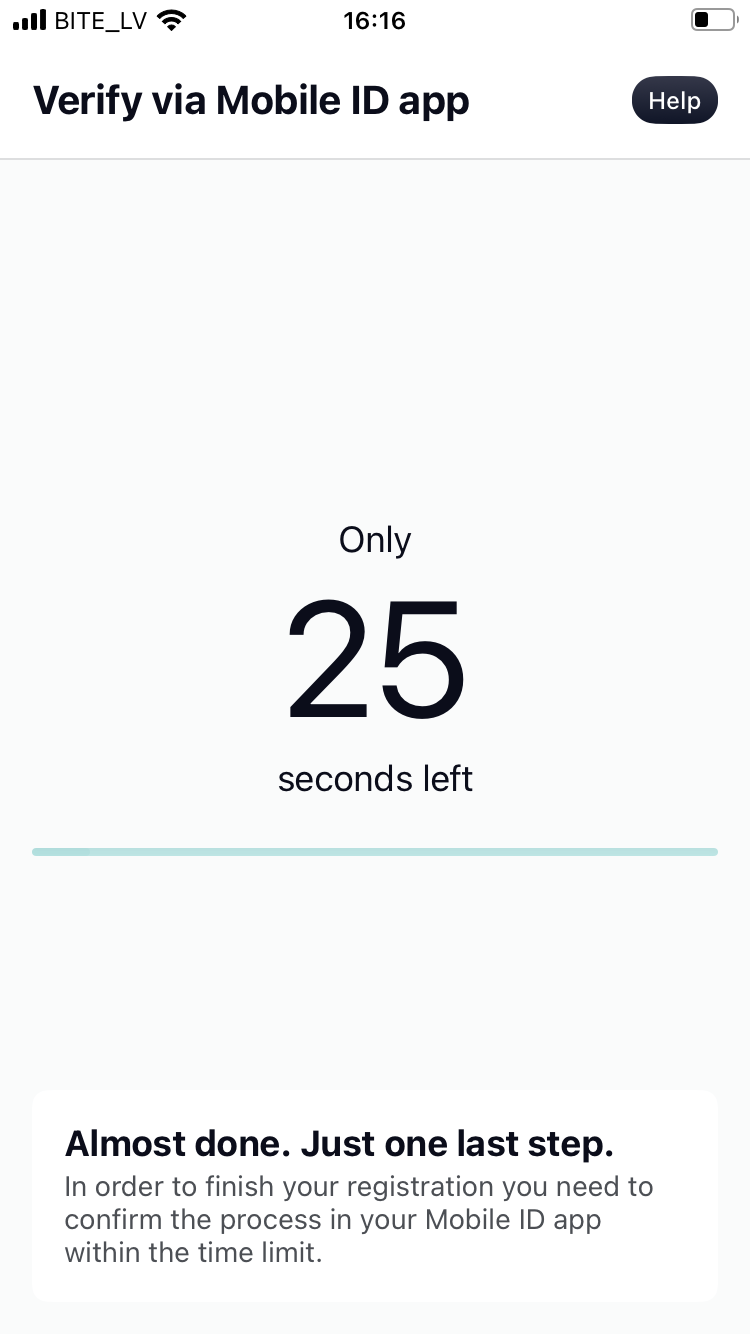
4.16. In the following step, the system will react in one of two ways:
Option 1: If the system detects that your phone number is connected to an existing Mobile ID account, you will be asked to verify it in your app.
Option 2: If the system detects that your phone number is not connected to an existing Mobile ID account, you will be required to set up a password.

4.17. Once you've verified your phone number, you will have successfully verified your identity!
4.18. Now go back to the initial signing window and press "Continue" to continue signing the document.
Note: If the signing session has expired while you were going through the identity verification process, you will see an "Unknown error" message pop up after pressing "Continue". In that case, we recommend reopening the Dokobit signing window and starting over. However, this time the system will detect that your data is connected to a Swisscom account, and you will be able to proceed with the signing process without needing to re-verify your identity.
Unsure if the identity verification process was truly successful?
Double-check if you were registered in the Swisscom database → here.
Experiencing issues when attempting to verify your identity?
For FAQ regarding the Nect Wallet app, please visit their support center → here.
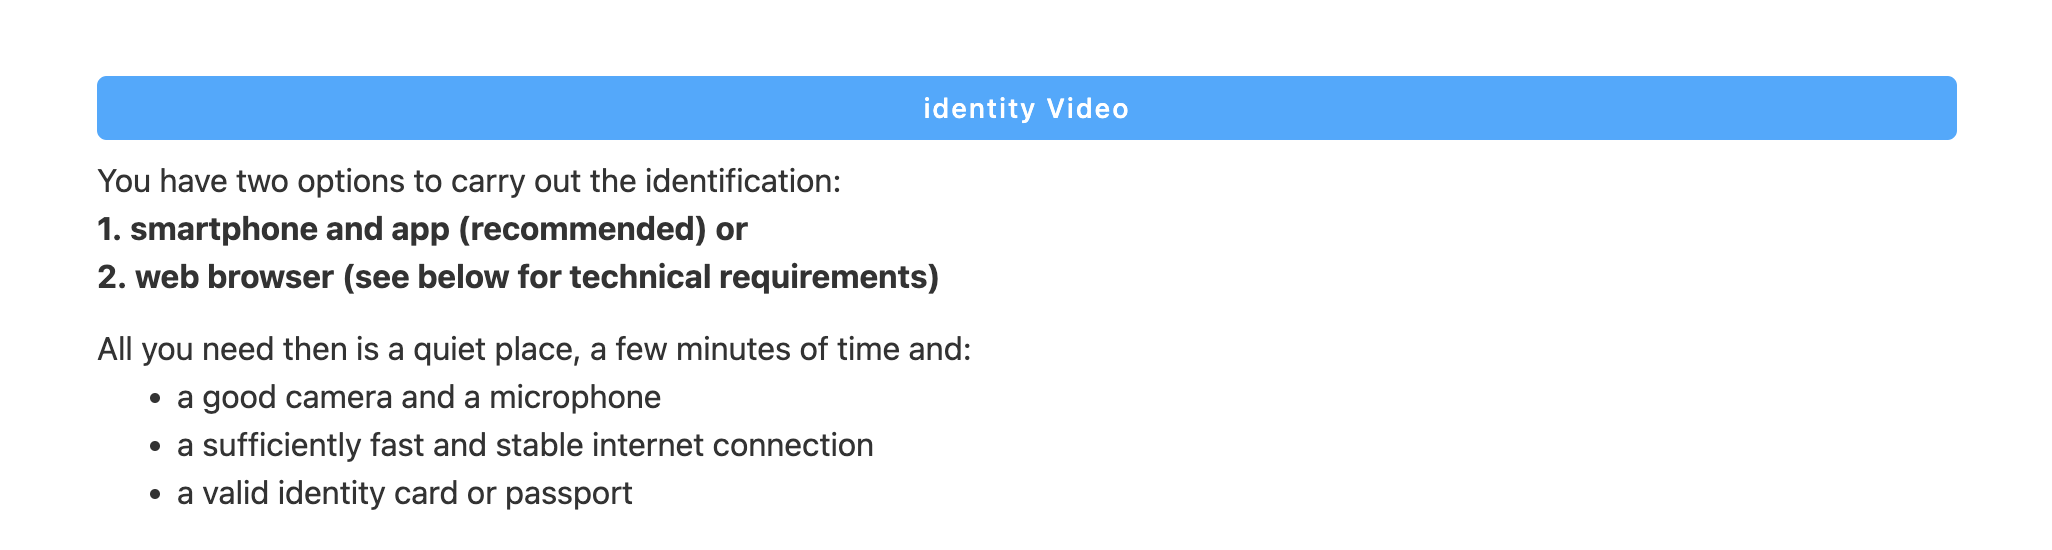
Additional instructions: verifying your identity with video identification
Summary: Video identification allows you to verify your identity through a video call service by talking to a live agent and following their instructions. For this method, you will either need a desktop computer with a built-in webcam and a reliable internet browser or a smartphone and the Identity.TM app. A valid ID will also need to be presented. You will be required to converse in English or German. For further instructions, follow the steps below. ↓
5.0. When choosing an identity verification method, pick "Video identification" and press "Continue".
Familiarize yourself with the requirements of the process and press "Start".
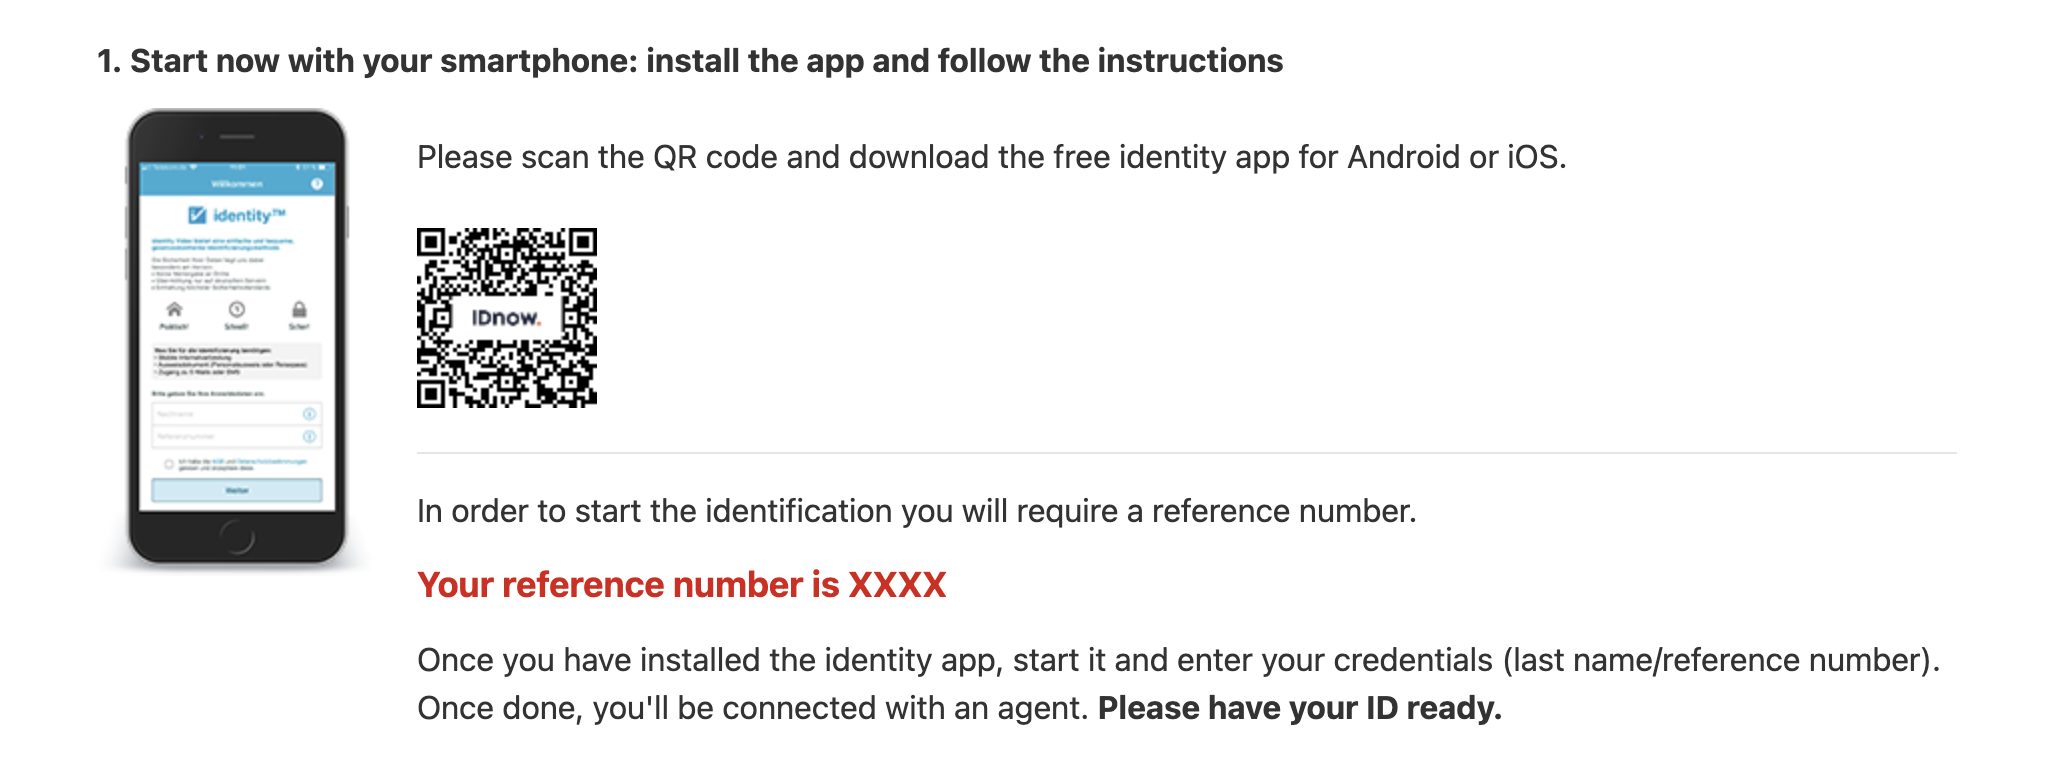
5.1. You will then be redirected to the identity.TM website. Here you will be given the choice between verifying your identity using your smartphone and the identity.TM app or your web browser.
If you'd like to carry out the process using your smartphone, in the first step, scan the QR code and follow the instructions as listed in the image example below.
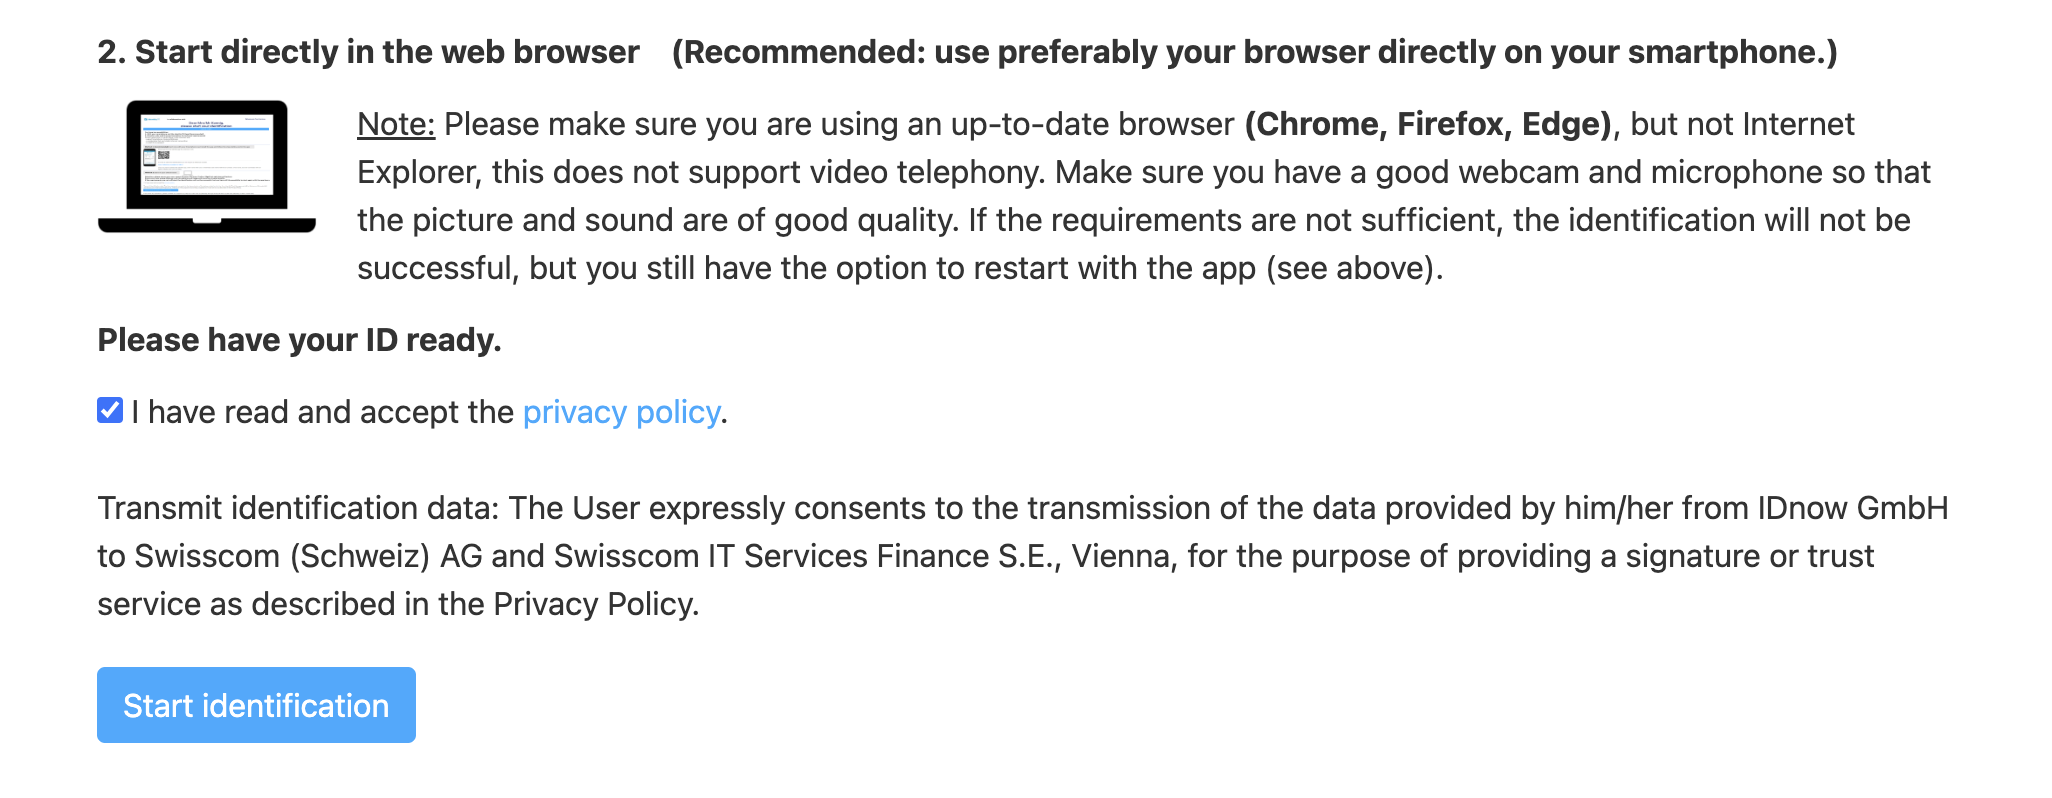
If you'd like to carry out the process using your web browser, accept their privacy policy and press "Start identification".
Note: For demonstration purposes, in the following steps of these instructions, we will be using the smartphone method. Even though the smartphone method requires downloading an additional app, please be aware that the basic steps for both methods are actually the same.
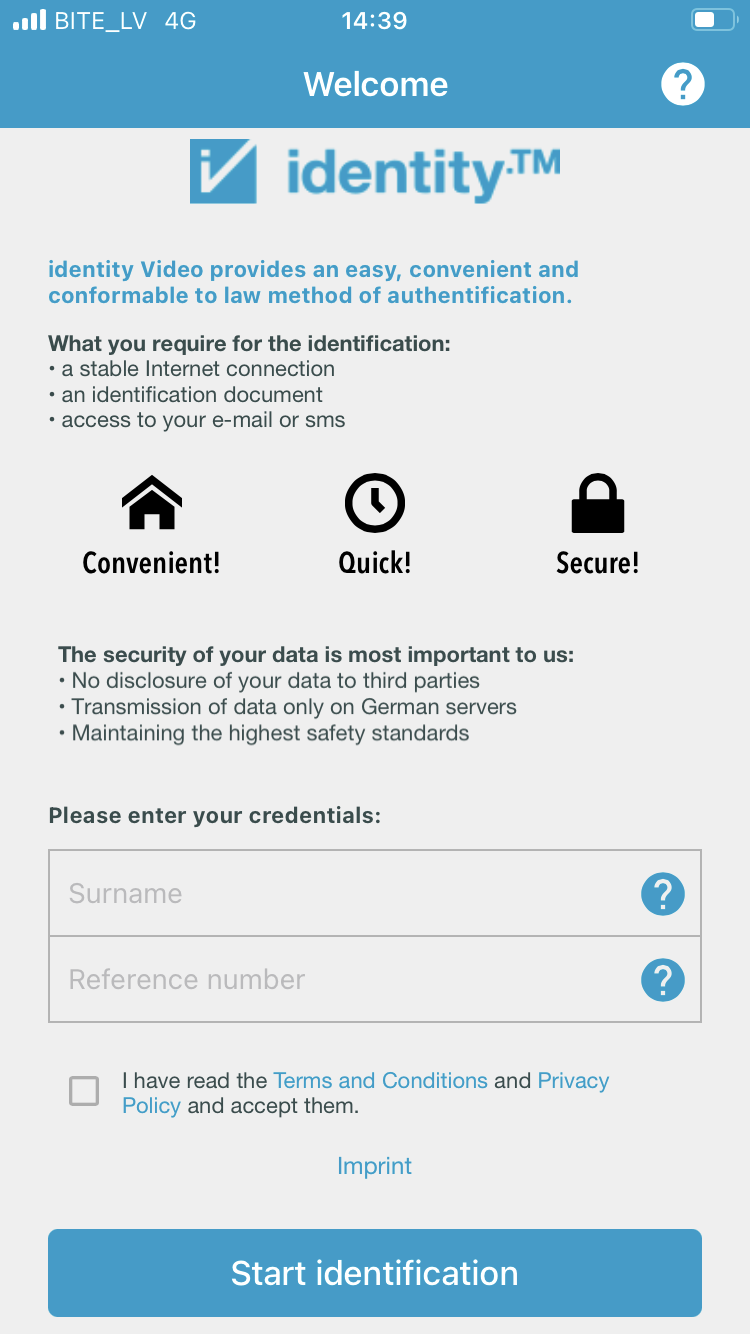
5.2. Once the app has been downloaded and opened, enter your surname and reference number and press "Start identification".
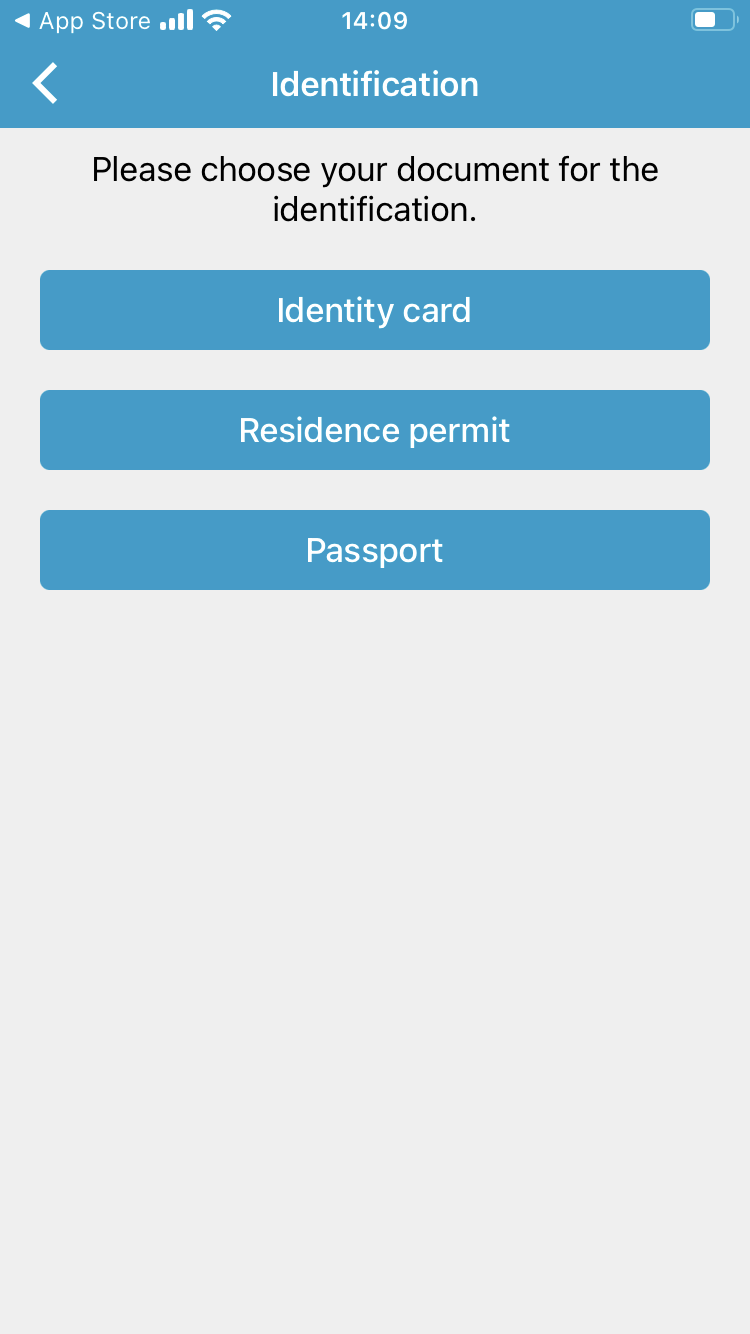
5.3. Then, select the ID you're going to use for identification.
5.4. Grant the app permission to access your camera.

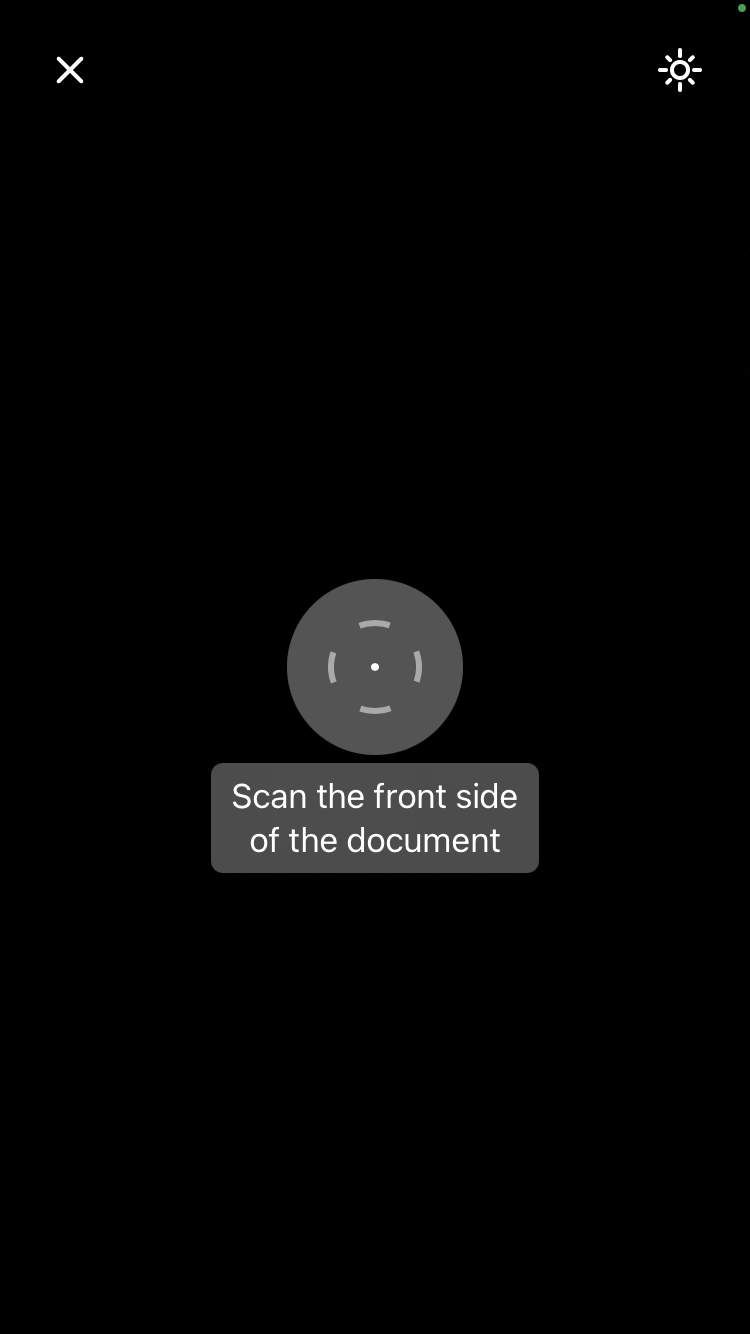
5.5. Scan the front of your document. For ID cards, you will also be required to scan the back of your document.
Note: For demonstration purposes, the camera screen has been blacked out in the following screenshot example.
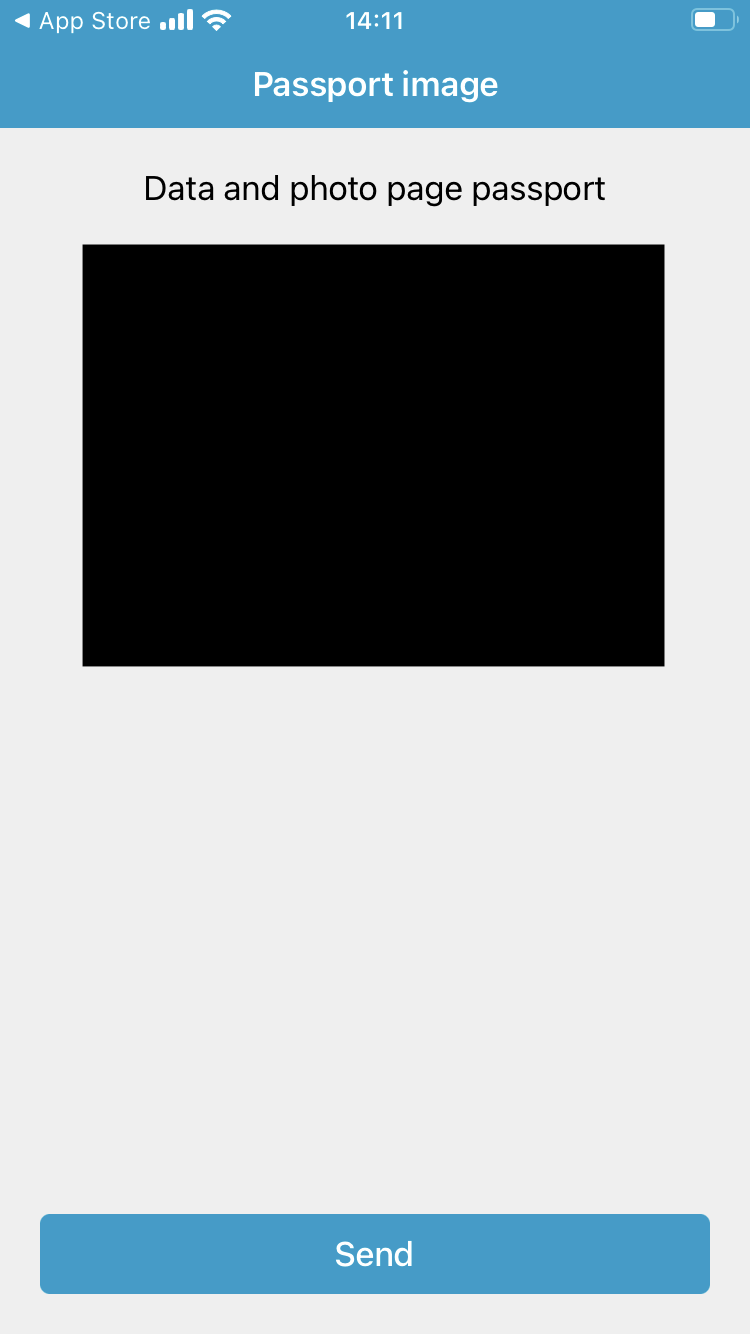
5.6. If the photos taken are clear enough, press "Send".
Note: For demonstration purposes, the camera screen has been blacked out in the following screenshot example.
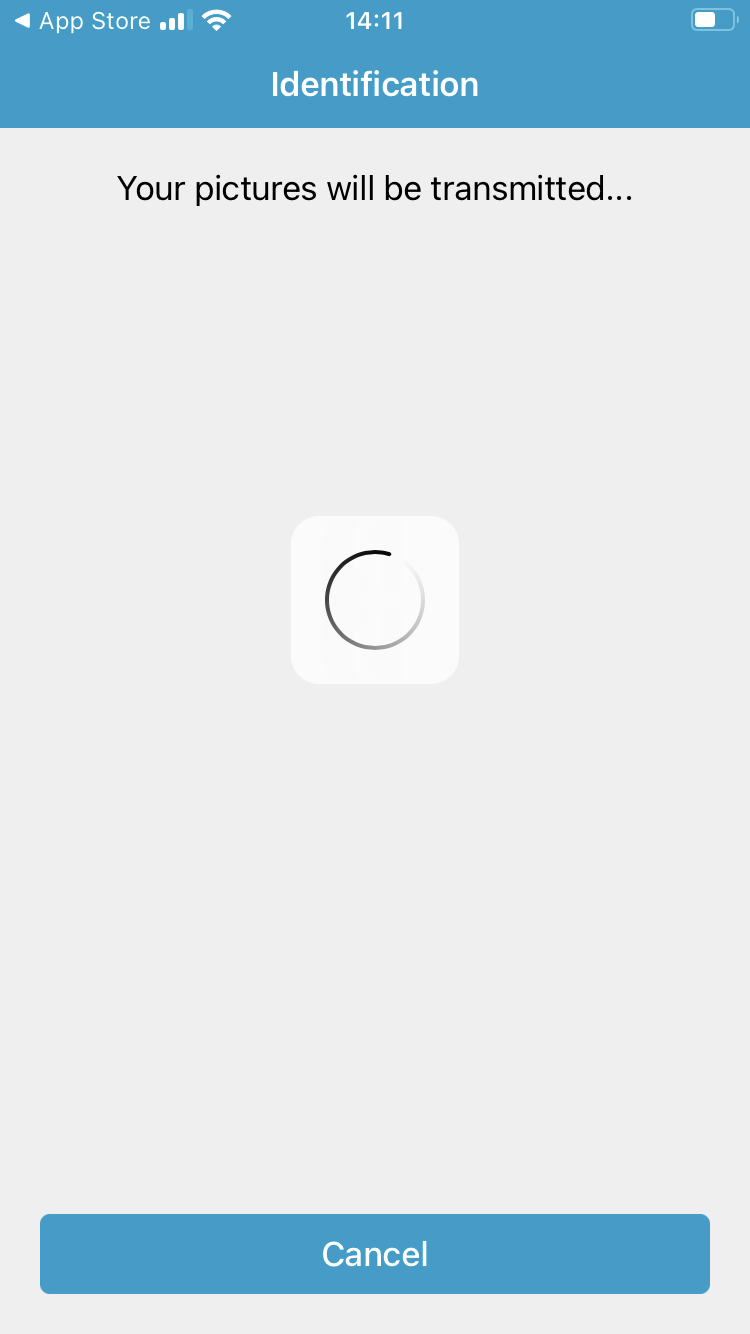
Then, wait for your pictures to be transmitted.
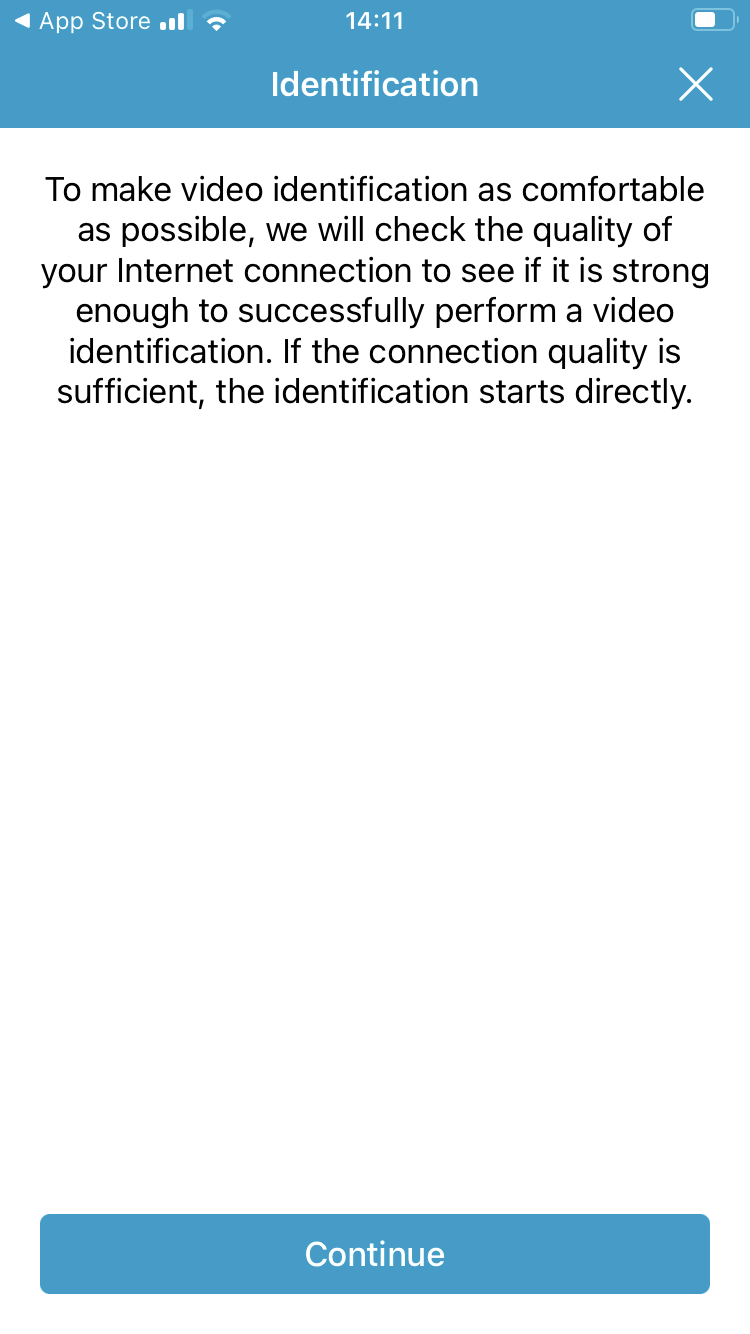
5.7. The identity.TM app will need to test the strength of your internet connection to ensure successful video identification. To allow this, press "Continue".
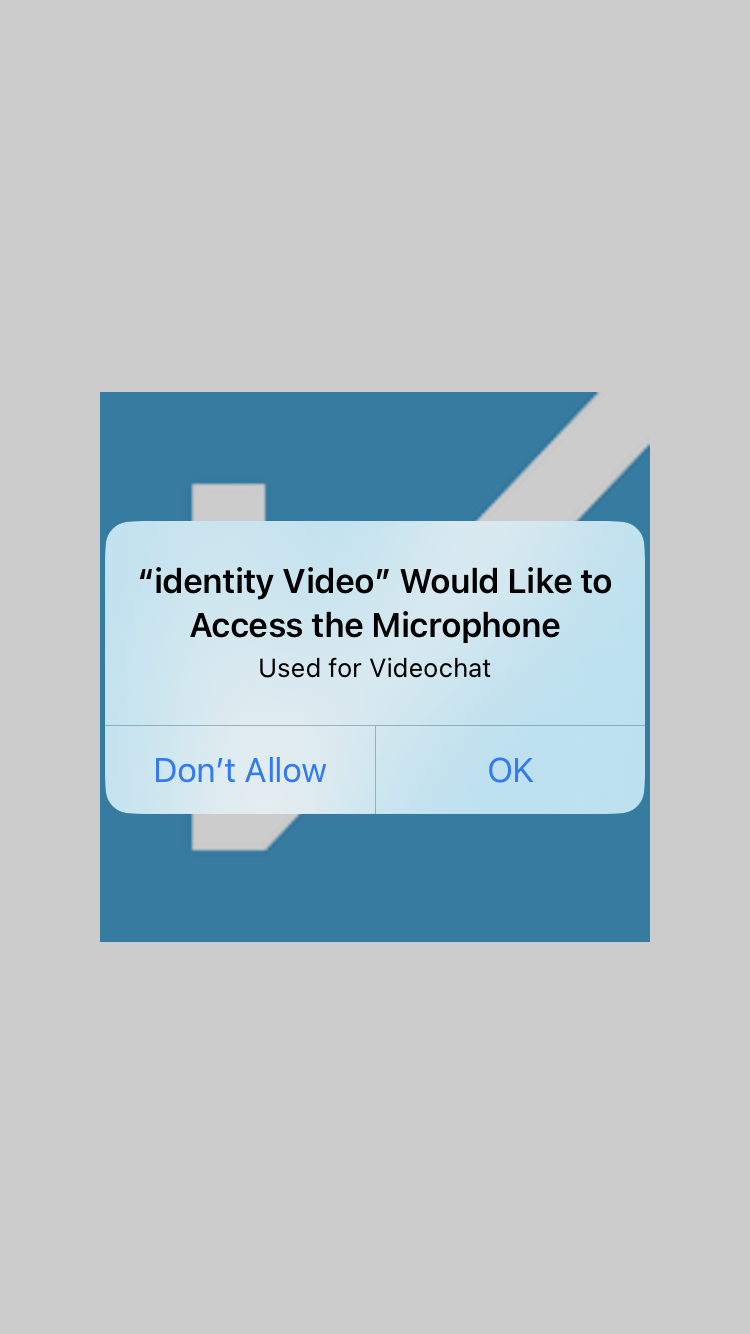
5.8. If the connection is strong enough, you will have to grant the app permission to access your microphone.
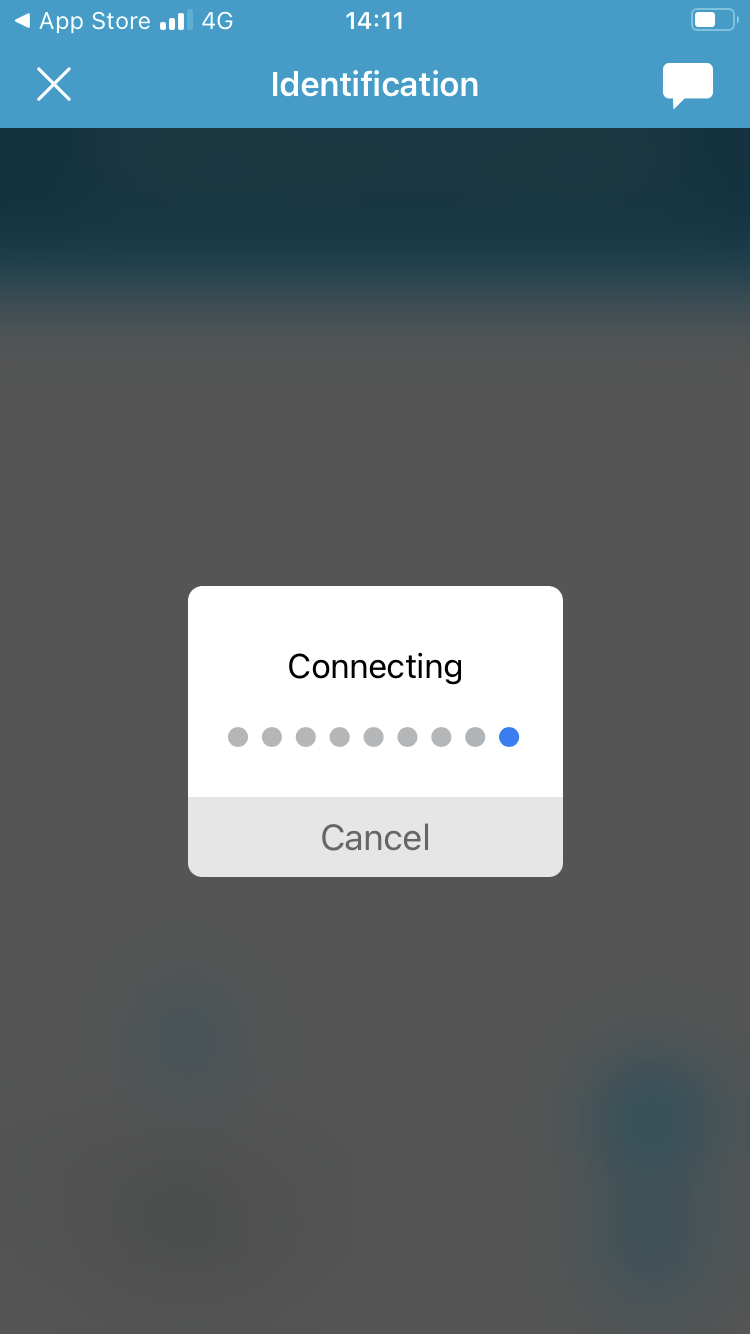
5.9. Wait for the video identification window to load.
5.10. Here your front-facing camera will turn on, and you will have to wait to be connected to a live agent. Once they connect, follow the instructions given by the agent.
Note: For demonstration purposes, the camera screen has been blacked out in the following screenshot example.

Near the end of the conversation with the live agent, you will be sent a link to your mobile phone where you will have to agree to the Terms and Conditions of Swisscom by either using your Mobile ID app or an OTP. If you don't have a Mobile ID account, you will also be asked to set up a password for signing documents.
5.11. Once the identification process has been completed, go back to the initial signing window and press "Continue" to continue signing the document.
Note: If the signing session has expired while you were going through the identity verification process, you will see an "Unknown error" message pop up after pressing "Continue". In that case, we recommend reopening the Dokobit signing window and starting over. However, this time the system will detect that your data is connected to a Swisscom account, and you will be able to proceed with the signing process without needing to re-verify your identity.
Unsure if the identity verification process was truly successful?
Double-check if you were registered in the Swisscom database → here.