
How to delete a document
Documents that have been uploaded to the Dokobit portal can be moved to the trash bin and deleted if necessary.
Note: Document deletion is an irreversible action.
In this article:
How to delete documents
Summary: If an uploaded document hasn't been signed by another participant, it can be completely deleted from the portal. However, if the document has already been signed by another participant, only the copy in your account can be deleted. Follow the steps below to find out more.↓
1.0. Log in to the portal and go to the "Documents" section located at the very top of the page.

1.1. Mark the necessary documents by hovering over them and adding a checkmark.

1.2. In the row above the documents, an additional toolbar will appear. Press "Delete".

1.3. Another window will pop up. Here you might be given a choice between two ways in which to delete the document(s): "Delete for me only" and "Delete for everyone".

"Delete for me only"

→ Deletes the document from your Dokobit account only. This is relevant if other signing participants were also added.
→ Performing this action results in the document first getting moved to the trash bin. If you'd like to permanently delete the document from the trash bin as well, follow the instructions here.
→ If a participant has been added to the document and they haven't yet signed, performing this action will result in your copy getting deleted; however, the added participant will still have access to their copy of the document and will also be able to sign it if they choose to do so.
→ This is the only available option for documents that either have already been signed by added participants or if none were added.
"Delete for everyone"
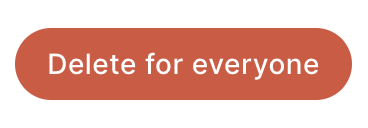
→ Deletes the document from your Dokobit account and from the account of other signing participants if they were added to the document.
→ Performing this action results in the document getting immediately deleted without being moved to the trash bin first.
→ If a participant has been added to the document and they have already signed, a copy of it will be stored in the participant's account, and you will no longer have the capability of deleting this document for everyone involved. In this case, you will only have the option to "Delete for me only".
1.4. Make the appropriate choice for your situation and confirm the action.
How to restore documents from the trash bin
2.0. Open the trash bin by pressing on your name to reveal the drop-down menu and then selecting "Trash bin".

2.1. Mark the necessary documents by hovering over them and adding a checkmark.

2.2. In the row above, an additional toolbar will appear. Press "Restore".

2.3. In the pop-up window, confirm the action by pressing "Restore".

How to delete documents from the trash bin
Note: Documents that have been in the trash bin for more than 30 days are automatically deleted.
3.0. Open the trash bin by pressing on your name to reveal the drop-down menu and then selecting "Trash bin".
3.1. Mark the necessary documents by hovering over them and adding a checkmark.
3.2. In the row above, an additional toolbar will appear. Press "Delete forever".
3.3. In the pop-up window, confirm the action by pressing "Delete".

Note: Alternatively, if you'd like to delete the documents from the trash bin all at once, in the row above the documents, press the button "Empty trash bin".
